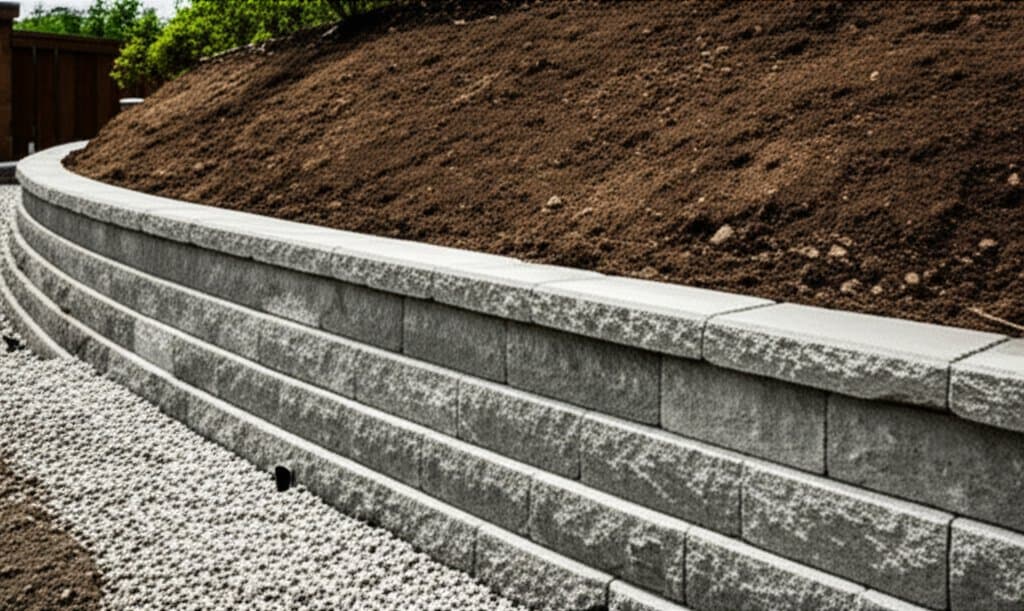
Understanding Water Pressure and Retaining Wall Failure
Water pressure poses a significant threat to retaining walls, often leading to structural failure if not addressed properly. Hydrostatic pressure builds up behind the wall when water accumulates in the soil, exerting force that can cause cracks, bulging, leaning, or complete collapse. Built-in drainage solutions mitigate this risk by channeling water away, preserving the wall's integrity and protecting surrounding landscapes from erosion.
Effective drainage transforms retaining walls into durable features that withstand environmental stresses. Homeowners and landscapers benefit from understanding how to incorporate these systems during construction. This article explores preparation, installation, design options, and maintenance to help you build walls that endure.
Site Preparation Essentials
Before beginning excavation, contact local utility services to mark underground lines and avoid disruptions. Assess the slope angle, existing drainage patterns, and soil type to inform your approach. Clay soils hold water longer than sandy types, so plan for wider gravel backfill zones and larger outlet pipes in such conditions.
Establish a stable foundation by placing the wall base on compacted crushed stone instead of native soil. This step prevents settling over time. Slope the backfill area gently to direct surface water toward the drainage system or a safe exit point, reducing the load on the wall from the start.
Step-by-Step Installation Guide
Follow these precise steps to integrate drainage during construction, ensuring long-term stability.
- Mark the wall layout and desired height with chalk lines for straight, accurate lines.
- Excavate a trench deep enough for the base, typically 6 to 8 inches below the final grade level.
- Compact the subsoil firmly, then add and compact base stone in layers no thicker than 2 inches each.
- Lay the first course of blocks, checking for level alignment and tight joints to form a solid start.
- Place a perforated drain pipe directly behind this base course, sloping it slightly toward the outlet for efficient flow.
- Backfill the area behind the wall with clean, coarse gravel up to 12 inches deep to create a drainage reservoir.
- Wrap the gravel zone in geotextile filter fabric to prevent fine soil particles from clogging the system.
- Build additional block courses, backfilling in stages to maintain balance as the wall rises.
- Cap the wall with secure stones, add edge restraints if needed, and grade the surrounding soil to steer surface water away from the face.
These steps apply to most modular block systems and emphasize precision to avoid common pitfalls.
Design Configurations and Aesthetic Choices
Choose configurations that suit your site's needs while incorporating drainage from the outset. Modular blocks allow flexibility in layout.
- Straight walls work well for property boundaries or along driveways, providing clean lines and simple drainage routing.
- Curved designs blend seamlessly into landscapes, distributing pressure evenly and adding visual interest.
- Tiered setups reduce stress on each level, ideal for steep or wide slopes where a single tall wall might fail.
Select textures and finishes that match your style: split-face blocks for a natural, rugged look or smooth surfaces for modern appeal. Always confirm that block sizes and weight ratings meet the project's height and soil pressure requirements. Consult engineering guidelines for walls over 4 feet to ensure safety.
Deciding Between DIY and Professional Installation
Confident builders can handle walls under 3 feet tall with integrated drainage, provided they use essential tools such as a plate compactor for soil, a spirit level for alignment, and a masonry saw for cuts. Allow extra time for meticulous leveling to prevent future shifts.
Hire professionals for more demanding projects, including:
- Walls taller than 3 feet, where structural calculations become critical.
- Sites with steep slopes, expansive clay soils, or poor drainage.
- Areas near driveways or paths that bear vehicle weight.
- Complex features like curves, multiple terraces, or lighting integrations.
- Connections to storm drains or municipal systems.
Professionals conduct slope stability assessments, adhere to local codes, and integrate outlets properly, minimizing risks and ensuring compliance.
Diagnosing and Resolving Common Issues
Early detection keeps minor problems from escalating. Inspect walls annually or after heavy rains.
Bulging often stems from poor backfill compaction or blocked drainage. Excavate behind the affected area, clear the pipe of debris, and refill with fresh gravel to restore support.
Leaning indicates base settling or water buildup. Reshape the backfill slope and inspect the foundation for cracks; reinforce as necessary.
Erosion at the base requires adding compacted gravel and redirecting nearby downspouts or runoff paths.
Pooled water near the foundation suggests a flat pipe or high outlet. Test the slope with a hose to flush sediments and adjust elevations for better flow.
Considerations for Regional Climates
Adapt designs to local conditions for optimal performance. In cold climates with freeze-thaw cycles, select frost-resistant blocks and use highly permeable gravel backfill to accommodate ice expansion without damage.
Wet areas demand robust protection: install dual-layer filter fabric to block silt while allowing water passage. Coastal sites exposed to salt require corrosion-resistant pipes and fittings to prevent premature deterioration.
Arid regions may focus on capturing occasional runoff, but always prioritize permeable materials to handle sudden storms.
Alternative Drainage Methods
Standard perforated pipes suit most applications, but alternatives exist for unique sites.
Weep holes, spaced every 6 to 8 feet, provide simple relief for shorter walls under 4 feet, allowing water to seep out directly.
Drainage mats, made of flexible composite materials, promote vertical water movement to the base pipe, ideal for tight spaces or retrofits.
Evaluate site constraints before choosing; combine methods if needed for enhanced effectiveness.
Ensuring Long-Term Wall Resilience
Drainage systems require ongoing care to function reliably. Clear outlets of leaves and debris seasonally, and regrade settled backfill to maintain proper slopes.
Monitor for signs of water pooling after storms, addressing issues promptly to prevent erosion. This proactive approach not only extends the wall's lifespan but also safeguards your property's value and beauty for years to come.
