Building vegetated block retaining walls that work with nature
Skill level: Intermediate
Physical demand: Moderate to high
Helpers recommended: At least one
Pro involvement: Required if structural height exceeds local code limits or if soil pressure is uncertain
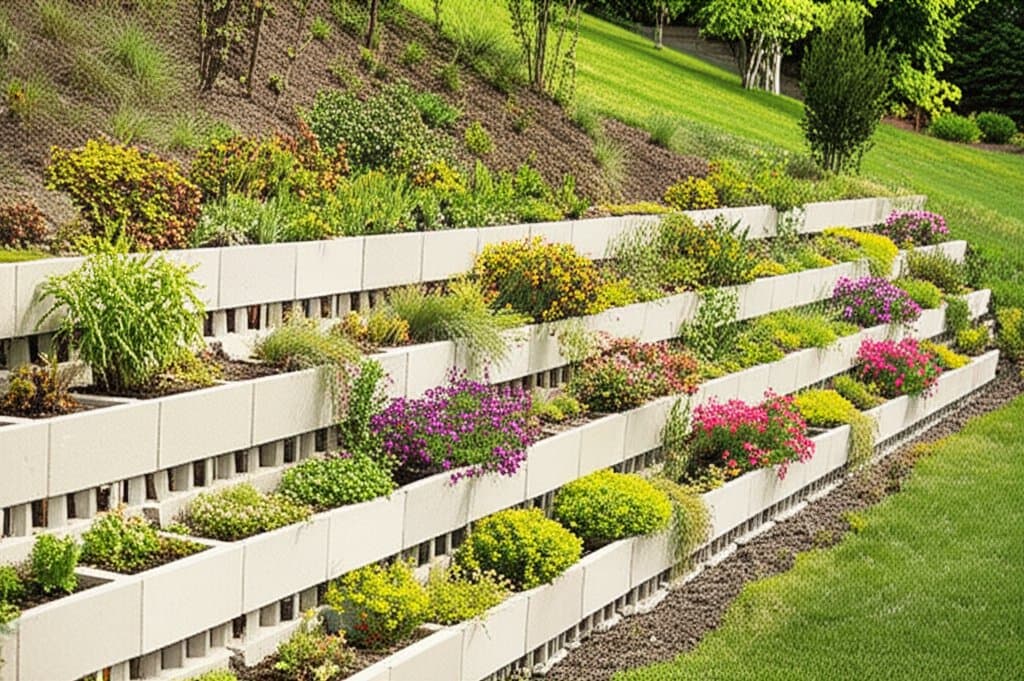
Building a vegetated block retaining wall is an effective way to stabilize slopes, manage runoff, and create a natural green feature that improves with time. Unlike solid stone or concrete walls that seal the earth behind them, vegetated systems breathe. They use modular blocks or units that support plant growth, allowing roots to knit the structure into the landscape. The result is a living wall that blends engineering with ecology.
Reality check before starting
This project suits homeowners with solid DIY experience in landscaping, grading, and basic masonry. Expect several days of labor, especially for excavation and leveling. The wall’s stability depends on careful base preparation and accurate stacking. Heavy lifting is involved, so plan for help during block placement. If your design exceeds four feet in height or carries a load such as a driveway or building pad, hire a licensed engineer and contractor. Structural walls under pressure must never rely solely on DIY assembly.
Understanding vegetated blocks
Vegetated block walls use interlocking units made from concrete, recycled composites, or porous aggregates. Each block includes cavities that hold soil and plants. The wall’s stability comes from gravity and the mass of the blocks combined with the binding strength of plant roots. Over time, vegetation reduces erosion, filters runoff, and softens the visual impact of hardscape.
There are three common types of vegetated block systems:
- Modular concrete units: Heavy blocks with planting pockets. Best for medium to large walls. Long lifespan, high strength, low maintenance.
- Lightweight composite blocks: Easier to handle, often made from recycled materials. Slightly less durable but excellent for small terraces and garden walls.
- Geo-grid supported systems: Combine blocks with soil reinforcement mats. Used for tall or steep slopes. Requires professional design and installation.
Traditional stone retaining walls rely solely on gravity and friction. They shed water instead of absorbing it. Vegetated systems, by contrast, manage moisture through root uptake and infiltration, reducing hydrostatic pressure behind the wall. This difference makes them smarter for sustainable landscapes.
Critical decision point: DIY or professional build
A vegetated wall under four feet with gentle slope conditions fits a capable DIYer. Anything taller or supporting a structure must be professionally engineered. Soil pressure increases rapidly with height, and failure can cause collapse. Always check local building codes and call 811 before digging to locate buried utilities.
If your site has clay soil, poor drainage, or steep terrain, consult an engineer. Professionals can design proper drainage layers, geogrid reinforcement, and footing systems to prevent movement.
Planning your vegetated block wall
Assessing the site
Start by studying your slope. Identify the high and low points and determine the wall’s alignment. Note where water flows during rainfall. Avoid placing the wall in areas with standing water or near septic components. Record the slope angle and soil type by digging a small test hole. Sandy soils drain well but require stable compaction. Clay soils hold water and may need additional drainage layers.
Measurements to take
Measure the total run length of the wall and the height difference between top and bottom. Plan for a base trench one block below grade plus gravel footing. Multiply the wall length by height to estimate block quantities, then add about 10 percent for cuts and waste.
Pro tip: Buy about ten percent extra blocks to cover breakage and future repairs.
Environmental factors to consider
Vegetated blocks thrive with sunlight and moderate moisture. Avoid shaded or continuously wet areas where plants may struggle. Consider the local climate and choose native plant species that tolerate both drought and seasonal rain.
Obstacles to expect
Watch for tree roots, irrigation lines, or buried cables. These can interfere with excavation and drainage installation. Relocate small roots or adjust the wall alignment rather than cutting major roots that stabilize nearby trees.
Choosing materials
Option 1: Concrete vegetated blocks
- Description: Dense, interlocking units with front planting pockets.
- Pros: Very durable, minimal maintenance, excellent structural capacity.
- Cons: Heavy to handle, higher cost, less porous.
- Skill level: Intermediate to advanced.
- Maintenance: Occasional pruning and soil top-up.
- Best use: Medium to tall walls with strong structural needs.
- Aesthetic: Clean, modern, uniform appearance.
Option 2: Composite or recycled blocks
- Description: Lightweight units formed from recycled aggregates or polymers.
- Pros: Easier to move, environmentally friendly, simple to cut.
- Cons: Less mass for tall walls, limited color variety.
- Skill level: Beginner to intermediate.
- Maintenance: Replace damaged units as needed.
- Best use: Small garden terraces or decorative slopes.
- Aesthetic: Natural texture with subtle color variations.
Option 3: Soil bag or geocell systems
- Description: Fabric or polymer cells filled with soil and reinforced with geogrid.
- Pros: Excellent drainage, supports dense planting, flexible shape.
- Cons: Complex installation, requires engineering for tall walls.
- Skill level: Advanced or professional.
- Maintenance: Regular plant trimming and inspection.
- Best use: Steep slopes or erosion control projects.
- Aesthetic: Fully vegetated, blends into the landscape.
Gathering tools and materials
Hand tools
- Shovel and spade: For excavation and trench shaping.
- Hand tamper: To compact gravel and soil layers.
- Level and string line: To maintain straight, even courses.
- Rubber mallet: To adjust block alignment without cracking.
Power tools
- Plate compactor: Essential for large walls to compact the base properly.
- Masonry saw or angle grinder: For cutting blocks to fit corners or curves.
- Drill with mixing paddle: Useful for blending soil amendments.
Rental equipment
- Mini excavator: Speeds up digging for long walls.
- Wheelbarrow or power buggy: Moves gravel and blocks efficiently.
- Alternative: For small walls, manual digging and hauling work fine if you pace the effort.
Materials list
- Vegetated blocks or units
- Crushed gravel for base and drainage
- Landscape fabric
- Perforated drain pipe
- Topsoil mix for planting pockets
- Selected plants or groundcovers
- Stakes and string line
- Safety gear: gloves, steel-toe boots, and eye protection
Include a ten percent buffer in all material quantities.
Step-by-step instructions
- Excavate the base trench. Dig to a depth equal to one block plus 4 inches of gravel. The trench should be at least twice the block depth front to back. Keep it level along the wall length.
- Install the gravel base. Fill with compacted crushed stone, about 4 inches thick. This layer distributes weight and drains water.
- Lay the first course. Set each block level and tight to its neighbor. Use a rubber mallet and level to adjust. The first course determines the entire wall’s accuracy.
- Add drainage pipe. Place perforated pipe behind the base course, wrapped in landscape fabric. This prevents water buildup.
- Backfill and compact. Fill behind the first course with gravel and compact thoroughly.
- Stack additional courses. Stagger joints for stability. Use manufacturer’s guide for overlap and connection.
- Add planting soil in pockets. Mix topsoil with compost for better root growth.
- Plant vegetation. Choose hardy groundcovers or native perennials. Water gently to settle the soil.
- Finish grading. Smooth the top of the slope to direct runoff away from the wall.
- Inspect alignment. Check level, plumb, and setback every two to three courses.