Understanding Thermal Bricks and Their Role in Geothermal Energy Savings
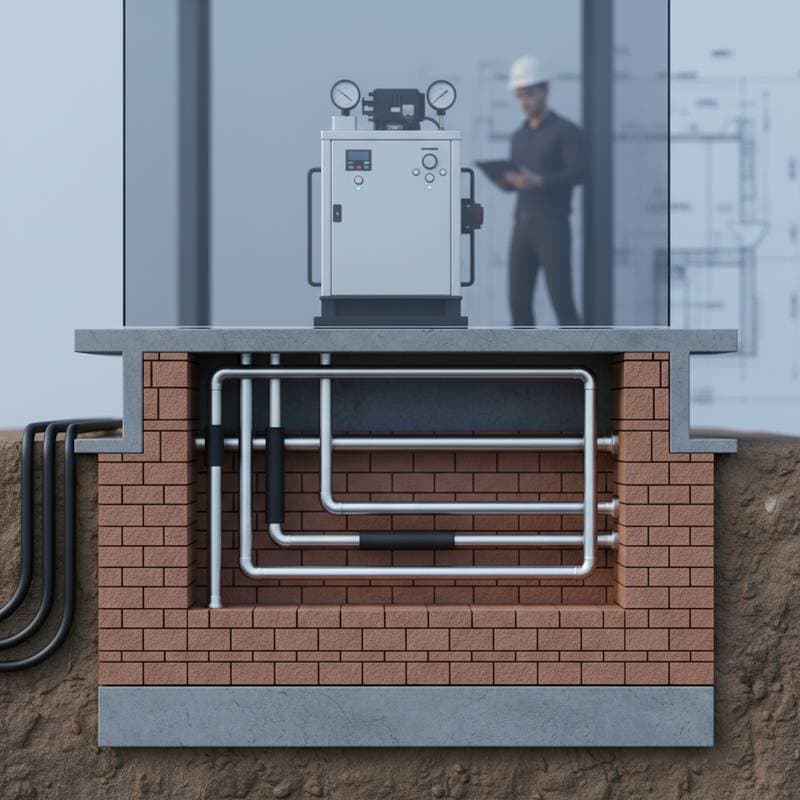
Thermal bricks function as thermal mass materials that absorb, store, and gradually release heat. This property helps maintain stable indoor temperatures by buffering against external fluctuations. When integrated with a geothermal system, which uses the earth's consistent underground temperatures for heating and cooling, thermal bricks enhance overall efficiency. The geothermal setup provides the primary climate control through buried loops that exchange heat with the ground, while the bricks stabilize room conditions, leading to reduced reliance on traditional HVAC equipment and lower operational costs.
This combination proves particularly effective in homes seeking energy independence. Geothermal systems alone can cut heating and cooling expenses by up to 70 percent compared to conventional methods, and thermal bricks amplify these savings by minimizing temperature swings. Homeowners benefit from a more even climate without frequent system cycling, which extends equipment life and improves air quality.
Advantages and Drawbacks
Advantages
- Energy Efficiency Gains: Thermal bricks maintain steady temperatures, reducing the need for constant HVAC operation and lowering overall energy consumption by 20 to 30 percent in well-designed setups.
- Long-Term Durability: Constructed from dense, high-quality clay or concrete, these bricks withstand environmental stresses with little degradation, often outlasting standard building materials.
- Safety Features: Their inherent fire resistance and non-toxic composition make them suitable for residential applications, meeting stringent building codes for health and safety.
- System Compatibility: They integrate seamlessly with passive solar designs and geothermal loops, allowing for hybrid approaches that maximize renewable energy use.
Drawbacks
- Structural Demands: The added weight requires reinforced foundations, potentially increasing preparatory engineering costs in older buildings.
- Upfront Investment: Material and labor expenses exceed those of conventional bricks, though payback periods typically range from 5 to 10 years through utility savings.
- Design Precision Needs: Improper installation can lead to thermal bridging, where heat escapes through gaps, necessitating expert oversight.
- Modification Challenges: Once installed, altering layouts proves difficult, so initial planning must account for future expansions or changes.
Investment Breakdown
Material costs for thermal bricks generally range from 2 to 6 dollars per square foot, influenced by factors such as density and regional sourcing. Professional installation adds 10 to 20 dollars per square foot, varying with wall thickness, local labor rates, and additional features like custom finishes or reinforcements. Complex projects, such as those in urban areas or with intricate patterns, may push totals higher.
Geothermal integration further affects budgeting; ground loop excavation can add 5,000 to 15,000 dollars depending on property size and soil conditions. However, these investments yield substantial returns. Annual utility savings often reach 1,000 dollars or more, with incentives like tax credits reducing net costs. Over a 20-year span, the system pays for itself while contributing to property value increases of up to 10 percent in energy-efficient markets.
Durability and Upkeep Practices
Properly constructed thermal brick installations endure for 50 years or longer, resisting weathering and structural fatigue. Annual inspections focus on identifying mortar cracks, which can allow moisture ingress, and any discoloration indicating water damage. Address issues promptly by repointing joints with compatible mortar to preserve integrity.
Routine cleaning involves gentle brushing and washing with a mild detergent solution to remove surface dirt without eroding the material. Harsh chemicals, particularly acids, should be avoided as they compromise the brick's surface. For enhanced protection, apply a breathable masonry sealer every 3 to 5 years; this barrier repels water while permitting vapor escape, preventing internal condensation and mold growth.
Essential Specifications for Selection
In regions with harsh winters, select bricks tested for 100 or more freeze-thaw cycles to ensure they do not crack under temperature extremes. Structural applications demand a minimum compressive strength of 2,000 pounds per square inch, verified through manufacturer certifications. Adherence to ASTM C62 standards or equivalent local codes guarantees quality and performance.
For geothermal pairings, verify that adjacent insulation achieves an R-value of at least 19 to minimize ground heat loss. Vapor barriers must be impermeable yet flexible, positioned on the warm side of the wall to control moisture flow. Consult building professionals to confirm compatibility with your specific geothermal exchanger type, whether horizontal, vertical, or pond-based.
Preparation and Site Planning
Successful projects begin with a stable, level foundation capable of supporting the bricks' weight, typically requiring soil compaction tests and possible grading adjustments. Ensure site drainage slopes at least 5 percent away from the wall base to prevent water pooling. Insulation layers, often rigid foam boards, install between the bricks and framing to create a continuous thermal envelope.
Vapor retarders, such as polyethylene sheets, go beneath slabs or behind walls to manage humidity. When linking to geothermal components, schedule ground loop trenching prior to masonry work to avoid disruptions. Always engage utility locate services at least 48 hours in advance to mark underground lines, averting costly damages and delays.
Step-by-Step Installation Guide
- Mark wall perimeters and verify squareness using string lines and a 3-4-5 triangle method for accuracy.
- Dig footings to local code depth, typically 24 to 36 inches, and pour concrete with embedded rebar for reinforcement.
- Place a moisture barrier, such as 6-mil polyethylene, over the footing before adding any insulation.
- Prepare mortar with a 1:3 cement-to-sand ratio, ensuring a workable consistency that holds shape without slumping.
- Start laying from established corners, using full bricks first and cutting fillers as needed with a masonry saw.
- Level and plumb each course with a spirit level, adjusting with thin mortar joints of 3/8 inch.
- Finish joints by striking or tooling them while wet to form a tight seal against weather infiltration.
- Cure the wall under moist conditions for at least 7 days before sealing or finishing applications.
Aesthetic and Functional Patterns
Running bond, with each row offset by half a brick, provides strength and visual appeal for most exterior walls. Stack bond offers a modern, grid-like look but requires extra reinforcement for stability. Flemish bond alternates headers and stretchers for decorative flair and improved thermal performance.
Denser configurations, like those with integrated vents, enhance mass but demand skilled labor. Color selection influences efficiency: darker tones capture solar heat in cooler climates, while lighter options reduce heat absorption in sunny, arid areas. Consider textured surfaces for better grip and aesthetic integration with surrounding architecture.
Deciding Between DIY and Professional Installation
For non-structural elements like garden borders or decorative interior features, DIY approaches suit experienced homeowners with basic tools such as trowels and levels. Follow safety protocols and local permits to ensure compliance. However, load-bearing walls or geothermal-integrated projects necessitate certified masons who understand engineering principles and code requirements.
Professional involvement becomes essential for intricate details, such as embedding sensors for smart home systems or coordinating with HVAC specialists. Expect consultations to include structural assessments and energy modeling to predict performance. This expertise minimizes risks and optimizes long-term outcomes.
Addressing Common Issues and Solutions
Settling foundations often cause cracking; monitor for hairline fissures and inject epoxy fillers for minor repairs, or underpin the base for severe cases. Thermal expansion mismatches between materials lead to stress; incorporate expansion joints every 20 feet to accommodate movement.
Efflorescence appears as white salts on surfaces, signaling excess moisture. Improve drainage with French drains if needed, and apply silane sealers to reduce solubility. For damaged units, remove affected bricks carefully with a chisel, then mortar in replacements matched for color and texture to maintain uniformity.
Adapting to Regional Climates
Cold climates demand bricks with absorption rates below 6 percent to resist frost damage, paired with deeper geothermal loops for stable ground temperatures. In humid subtropical areas, prioritize high compressive strength and antifungal treatments to combat mold.
Hot, dry regions benefit from bricks with solar reflectance indexes above 0.25, reflecting up to 25 percent more sunlight. Coastal installations require salt-resistant formulations to withstand corrosion from airborne particles. Across all zones, elevate walls slightly above grade and integrate weep holes for ventilation.
Achieving Optimal Integration and Benefits
Integrating thermal bricks with geothermal systems streamlines energy use by leveraging the bricks' mass to even out the geothermal output. This setup handles peak loads efficiently, reducing system strain and maintenance calls. Focus on airtight construction and balanced ventilation to maximize indoor air quality.
Homeowners realize immediate comfort from fewer drafts and hot spots, alongside environmental gains from decreased fossil fuel dependence. With diligent planning, quality materials, and periodic care, this investment transforms homes into resilient, cost-effective sanctuaries tailored to modern sustainability goals.