Understanding 3D-Printed Concrete
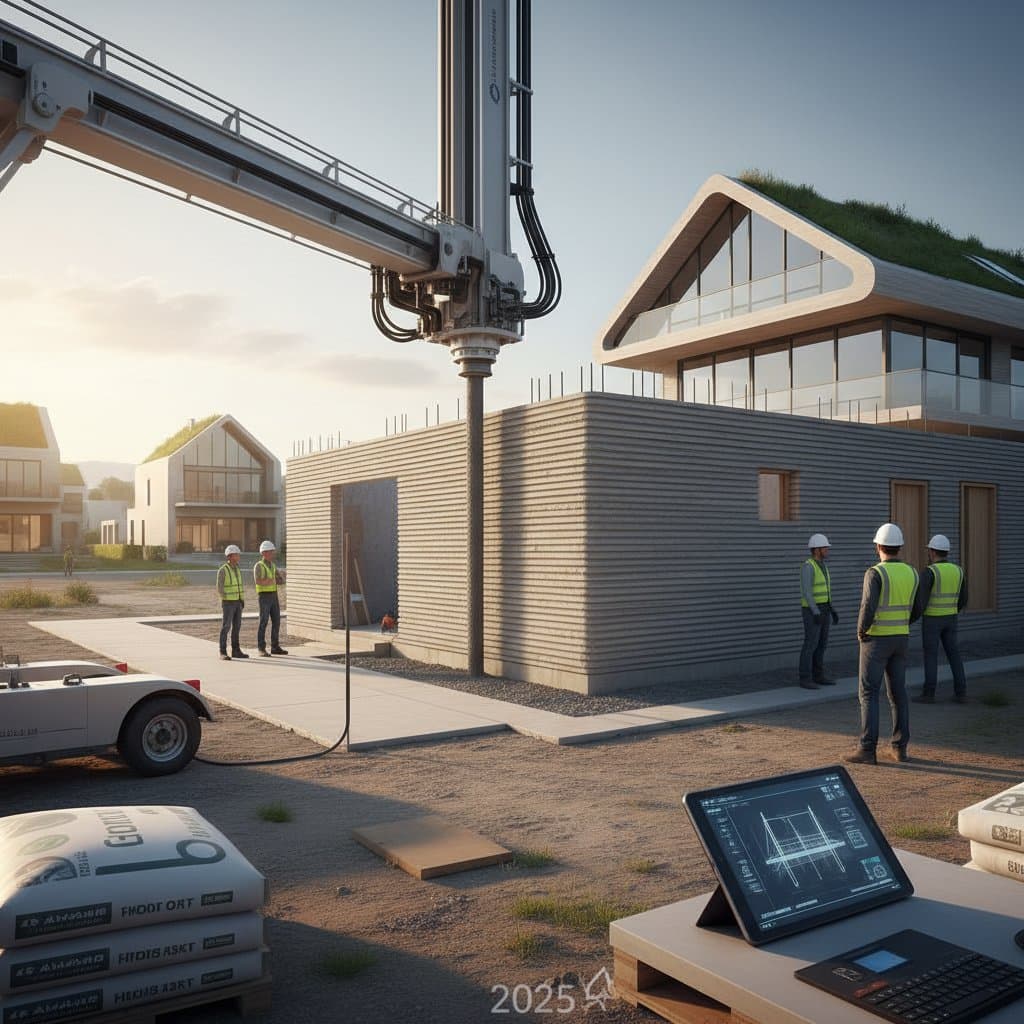
3D-printed concrete represents a significant advancement in residential construction methods. Specialized printers deposit layers of concrete according to digital blueprints, forming walls, foundations, and complete structures with exceptional precision. This method eliminates much of the manual forming and pouring associated with conventional techniques, yielding quicker assembly times, minimal material waste, and greater opportunities for innovative designs.
The technology integrates robotic automation, engineered concrete formulations, and computer-aided design software. Builders achieve structures that balance affordability with robustness. Labor demands decrease as the system operates continuously under supervision, enhancing efficiency. For regions grappling with housing deficits and escalating expenses, 3D-printed concrete provides a viable strategy for scalable, economical development.
The Importance of 3D-Printed Homes
Affordable housing depends on optimizing labor, timelines, and resource use. Conventional building processes demand extensive skilled labor for repetitive operations. In contrast, 3D printing streamlines these elements by depositing concrete layers precisely as dictated by the blueprint, which curtails excess materials and accelerates progress. A compact team oversees the printer, conducts quality assessments, and handles subsequent refinements after the primary framework emerges.
The concrete blend, comprising cement, aggregates, and performance-enhancing additives, extrudes smoothly and hardens rapidly without compromising strength. Formulations adapt to regional variations in weather or terrain, offering versatility in application. Such adaptability ensures reliable performance across diverse environments.
Sustainability advantages further elevate the value of this approach. Targeted deposition avoids material surplus, and formulations often incorporate recycled components. Consequently, waste diversion to disposal sites diminishes, and the overall environmental impact per residence declines substantially.
Professional Considerations: DIY Limitations and Expert Involvement
Although 3D-printed construction evokes visions of accessible homebuilding, it demands professional expertise. The equipment involves large-scale machinery that requires meticulous setup and ongoing adjustments. Concrete recipes necessitate formulation by qualified specialists to guarantee safety and durability. A licensed engineer evaluates load capacities, seismic resilience, and overall stability before approval.
Homeowners with construction experience may contribute to post-printing phases. Activities like installing insulation, erecting interior partitions, and refining exteriors fall within feasible DIY scopes, provided basic competencies exist.
Preparing for a 3D-Printed Concrete Project
Site Evaluation
Site preparation forms the foundation of any successful 3D-printed build. Ensure the ground achieves evenness through compaction and clearing of obstacles. Analyze drainage routes and soil composition to inform foundation specifications. Inadequate water management risks undermining wall integrity via subsurface moisture accumulation.
Contact local utilities to mark underground lines prior to any ground disturbance. Obtain necessary permits, as jurisdictions often mandate reviews for innovative techniques, including structural certifications.
Material Selection
Selecting the appropriate concrete variant influences project outcomes in terms of performance, expense, and ease of use.
Option 1: Standard Concrete Mix
- Pros: Widely accessible, delivers proven durability, compatible with existing contractor knowledge
- Cons: Potential for nozzle blockages without thorough particle screening
- Cost: Moderate
- Skill Level: Intermediate
Option 2: Polymer-Enhanced Mix
- Pros: Superior layer adhesion, enhanced flexibility against settling, smoother finished surfaces
- Cons: Elevated pricing, demands exact proportioning during preparation
- Cost: Premium
- Skill Level: Advanced
Option 3: Eco-Blended Mix with Recycled Aggregates
- Pros: Lowers ecological footprint, cost-effective procurement from sustainable sources
- Cons: Inconsistent texture requiring rigorous quality checks
- Cost: Affordable
- Skill Level: Intermediate
Essential Tools and Supplies
Assemble a comprehensive kit to support the printing and finishing stages.
- Hand Tools: Trowels for smoothing, spirit levels for alignment verification, tape measures for dimensional accuracy
- Power Tools: Portable mixers for on-site adjustments, angle grinders for edge refinement
- Rental Equipment: Industrial 3D printer equipped with extrusion heads and integrated control interfaces
- Materials Inventory: Base concrete mix, structural reinforcement grids, adhesive compounds, protective curing sheets, plus a 10 percent surplus for contingencies
Detailed Construction Process
Follow this sequence to execute a 3D-printed concrete project methodically.
- Establish the Foundation. Stabilize the soil through mechanical compaction, erect temporary formwork, and confirm base flatness. This step secures the entire edifice against shifts.
- Configure the Printer. Adhere to operational guidelines for adjusting nozzle positioning and material flow. Deviations lead to irregular deposits and potential weaknesses.
- Execute Wall Printing. Supervise the deposition rate and interlayer fusion closely. Maintain a debris-free zone to prevent operational halts.
- Incorporate Structural Supports. Embed rebar or fiber composites into designated voids during pauses in printing, bolstering tensile resistance.
- Facilitate Curing. Apply moisture-retentive coverings and monitor humidity levels over multiple days until compressive strength develops fully.
- Refine Exteriors. Address surface irregularities with sanding or patching, then coat with protective sealants or insulating layers.
Quality Assurance: Verify vertical alignment and levelness, allowing no more than one-quarter inch deviation over full height.
Practical Advice: Procure 10 percent additional materials to accommodate testing runs and unforeseen losses.
Integrating Utilities and Completing the Residence
With the concrete framework in place, proceed to embed essential systems. Engage certified electricians and plumbers to route wiring and piping in compliance with regulations. These integrations preserve the structure's integrity while fulfilling habitability standards.
Final enhancements encompass interior and exterior detailing. Apply paints or renders for aesthetic appeal, or leverage the printing process itself for textured facades. The result is a resilient, efficient home that embodies modern construction efficiencies, delivering long-term savings and environmental responsibility.