Understanding Smart Sensors for Foundation Monitoring
A stable foundation supports every structure, but shifts and settling occur over time in even the strongest builds. Smart sensors empower homeowners, builders, and engineers to identify foundation movements before cracks emerge or expenses mount. These small devices monitor soil pressure, vibrations, and moisture levels, issuing alerts when patterns indicate potential settlement. Such early insights support precise, minimally disruptive repairs that maintain safety and preserve property value.
Traditional foundation checks depend on manual examinations, obvious signs, or infrequent surveys. While valuable, these approaches miss ongoing minor changes. Smart sensors address this limitation through uninterrupted, automated tracking. They capture precise data to distinguish routine settling from emerging problems.
The Importance of Early Detection
Foundation settling develops gradually from initial small displacements. These can misalign framing, affect doors and windows, and damage interior elements. Without prompt alerts, minor fissures grow into major structural issues. Smart sensors enable action at a stage when solutions remain straightforward.
Predictability stands out as a primary benefit. Owners gain forewarning to bolster foundations, enhance drainage, or compact soil as needed. This forward-thinking strategy cuts repair expenses and prolongs the building's service life.
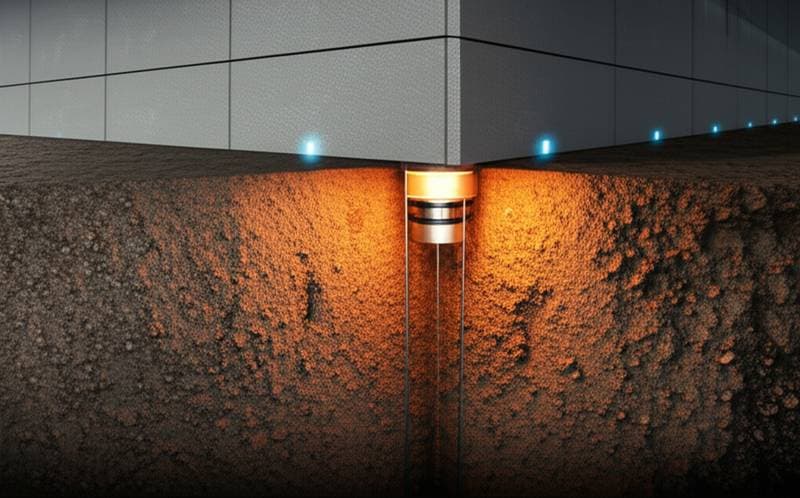
How Smart Sensors Function
Smart foundation sensors integrate sensing and transmission capabilities. They gauge factors linked to movement, including:
- Tilt: Captures angular deviations in foundation surfaces.
- Soil moisture: Gauges water content that causes soil expansion or contraction.
- Vibration: Logs ground or building tremors from equipment or earthquakes.
- Crack width: Monitors changes in preexisting fissures.
Sensors relay data to a hub or cloud service. Integrated software evaluates readings against predefined limits. Alerts arrive through apps, emails, or dashboards when thresholds are breached.
Balancing DIY and Professional Installation
Sensor setup and analysis suit both independent and expert efforts, based on project scale. Homeowners manage simple wireless units on reachable areas like slab edges or basement walls. Follow manufacturer guidelines closely for calibration and review.
Opt for professionals on intricate foundations, expansive structures, or unstable ground. Engineers customize sensor arrays to align with site-specific data and engineering models. Seek a certified structural engineer for geotechnical expertise.
Designing a Foundation Monitoring System
Site Evaluation
Start by examining soil composition, drainage patterns, terrain slope, and plant cover. Clay holds moisture and swells or shrinks accordingly, whereas sand drains fast yet moves under loads. Note past flooding or erosion around the base.
Key Measurements
Document foundation length, corner count, and any cracks. Gauge distances from the base to drainage points. These details guide sensor distribution and positioning.
Environmental Influences
Account for temperature fluctuations, groundwater depth, and precipitation trends. In wet climates, combine moisture and tilt sensors. In dry areas, prioritize vibration or crack monitors to spot shrinkage effects.
Potential Challenges
Anticipate signal disruptions, tight crawl space access, or dense concrete barriers. Ensure power sources for non-battery models.
Selecting Appropriate Sensors
Tilt Sensors
Overview: Quantify surface angular shifts.
Advantages: Precise for initial detections.
Drawbacks: Prone to errors from poor mounting.
Price Range: Medium.
Required Expertise: Moderate.
Ideal Applications: Flat slabs or retaining structures.
Moisture Sensors
Overview: Assess subsoil hydration.
Advantages: Spot leaks or runoff problems promptly.
Drawbacks: Need regular adjustment and upkeep.
Price Range: Budget-friendly.
Required Expertise: Entry-level.
Ideal Applications: Rain-prone or drainage-challenged zones.
Crack Monitoring Sensors
Overview: Track fissure expansions.
Advantages: Offer tangible movement proof.
Drawbacks: Limited to targeted spots.
Price Range: Low to medium.
Required Expertise: Entry-level.
Ideal Applications: Brickwork or below-grade walls showing cracks.
Consider acquiring 10 percent extra units for adjustments or growth.
Essential Tools and Supplies
Basic Hand Tools
- Screwdriver or powered driver for attachments.
- Measuring tape for precise intervals.
- Spirit level to confirm even placement.
Powered Options
- Rotary hammer for stone work.
- Battery-operated driver for efficiency.
- Stable ladder for high points.
Equipment to Rent
- Moisture tester for soil verification.
- Logging device or hub if separate from kit.
Supply Checklist
- Selected sensors.
- Brackets and anchors.
- Batteries or adapters.
- Sealant for weatherproofing.
Include a 10 percent surplus for errors or spares.
Installation Process
- Outline positions around the perimeter, spacing 10 to 15 feet apart.
- Bore starter holes or ready adhesive bases per guidelines.
- Affix sensors squarely and firmly, checking orientation.
- Link to the central unit and test connectivity.
- Adjust each unit to record starting values.
- Validate data flow for reliability.
- Shield cables from water exposure.
- Record baseline figures for ongoing reference.
Confirm stability by monitoring through a complete day-night cycle.
Optimizing Sensor Effectiveness
Position units at corners and support walls for optimal readings. Adhere to specified recalibration schedules. Select climate-resistant models to prevent failures. Trim nearby plants to ensure clear paths and avoid disruptions.
Ongoing Maintenance Practices
Inspect sensors quarterly for dirt buildup or loose connections. Replace batteries as indicators signal low charge. Recalibrate after major weather events or site alterations. Review data logs monthly to spot trends early. Document all checks to track system health over time.
System Upgrades for Enhanced Monitoring
Integrate additional sensors as the structure ages or expands. Connect to home automation for automated responses, like activating sump pumps on moisture spikes. Upgrade software for advanced analytics, such as predictive alerts based on historical patterns. Consult professionals for scaling to include seismic or load sensors in high-risk areas.
Avoiding Installation Pitfalls
Do not skip calibration procedures, as they ensure accuracy. Address drainage flaws highlighted by readings promptly. Mount only on level surfaces to prevent skewed data. Test signal reach thoroughly prior to securing positions. Overlook these, and reliability suffers, leading to missed warnings.