Heated Driveways Adopt Smart De-Icing Technology
A heated driveway contains built-in heating elements that melt snow and ice automatically. It keeps pavement clear without shoveling, plowing, or chemical de-icers. Smart systems now use sensors and automation to manage heat only when needed, reducing energy waste and improving safety.
Pros and Cons
Pros
- Automatic snow removal with no labor or salt.
- Improves safety by reducing slip and fall risk.
- Prevents surface damage from freeze-thaw cycles and salt corrosion.
- Smart controls reduce energy use by running only when snow or ice is detected.
- Adds property value when installed correctly.
Cons
- High upfront cost for materials and installation.
- Potential repair difficulty if heating elements fail under concrete or asphalt.
- Energy use can rise in long cold periods.
- Limited retrofit options for existing driveways without major work.
- Requires careful electrical planning and code compliance.
Costs
Material cost for electric heating cables or mats runs about $8 to $15 per square foot. Hydronic systems that use heated water in tubing cost about $12 to $25 per square foot. Installed cost is typically $15 to $40 per square foot depending on driveway size, surface type, and control system.
Costs rise with thicker slabs, long runs from power sources, and complex layouts. Hydronic systems need a boiler or water heater, which adds several thousand dollars. Smart controls and sensors add moderate cost but reduce long-term operating expenses.
Lifespan and Maintenance
A well-installed heated driveway can last 20 to 30 years, roughly matching the life of a quality concrete slab. Electric cables have no moving parts, so they need little maintenance. Hydronic tubing can last as long as the slab if protected from punctures.
Inspect sensors and control boxes before each winter. Check for tripped breakers or low-pressure alerts in hydronic systems. Clean sensor housings so they detect moisture accurately. Avoid using metal shovels or sharp tools that might scrape the surface and expose heating elements.
Specs to Check
- Voltage or BTU rating that matches your area's snowfall intensity.
- Watts per square foot for electric systems, usually 30 to 50 watts.
- Tubing material for hydronic systems, such as cross-linked polyethylene (PEX).
- Compressive strength of concrete, typically 4000 psi or higher for traffic areas.
- Moisture and temperature sensors rated for outdoor use.
- UL or CSA certification for electrical safety.
- GFCI protection required by electrical code for outdoor circuits.
Planning and Prep
A heated driveway needs a solid base and good drainage. The surface must slope slightly away from the house so melted water runs off instead of pooling. Poor drainage can cause ice sheets when the system shuts off.
Before digging, call to locate buried utilities. Check your electrical panel for capacity. Most systems need a dedicated circuit or subpanel. For hydronic setups, plan space for a boiler, pump, and manifold inside a garage or utility room.
Installation Overview
- Plan layout and load. Mark the heated area and confirm power or boiler location.
- Excavate to the full depth needed for base, bedding, and slab thickness.
- Compact base gravel in lifts to create a stable foundation.
- Lay insulation board rated for ground contact to reduce heat loss.
- Install heating cables or tubing according to spacing charts. Secure to the grid or rebar.
- Place sensors near the surface where snow first collects.
- Pour and finish concrete carefully without damaging cables or tubing.
- Cure fully before energizing or pressurizing the system.
- Connect controls and test all zones for even heating.
Patterns and Options
Electric systems use either loose cables or preformed mats. Mats go in faster and maintain consistent spacing, good for rectangular areas. Loose cable suits irregular shapes or partial heating zones, such as just the tire tracks.
Hydronic tubing can be looped in a serpentine or spiral pattern. Serpentine is simpler, while spiral gives more uniform heat in large pads. Smart systems can divide the driveway into zones so only key sections heat during light storms.
DIY vs Pro
DIY possible for small electric mat systems for short sidewalks or entry pads. They plug into existing circuits and use surface sensors.
Hire a pro for full driveway systems, hydronic setups, or any job tied to new concrete or asphalt. These require electrical permits, load calculations, and precise layout. Mistakes can trap air in tubing or short out cables, which are nearly impossible to fix after concrete sets.
Common Failures and Fixes
- Uneven heating often caused by broken cable or tubing kink. Use an infrared camera to locate cold spots, then patch if accessible.
- Sensor failure leaves the driveway off or running constantly. Replace the sensor head or clean debris blocking detection.
- Tripped breaker or GFCI indicates moisture in wiring or overload. Check junction boxes for water intrusion.
- Hydronic air lock causes uneven warming. Bleed air at the manifold until flow stabilizes.
Keep spare sensors and control fuses on hand. Maintain electrical connections in dry enclosures.
Regional and Climate Notes
- Cold climates use thicker insulation under slabs to prevent heat loss into frozen ground.
- Freeze-thaw zones require concrete with air entrainment to resist cracking from expansion.
- Coastal or high-salt areas need corrosion-resistant fittings and sealed electrical boxes.
- Sunny regions benefit from smart sensors that prevent unnecessary activation during mild days.
Alternatives
- Heated tire tracks only lower cost by using two narrow strips instead of full coverage.
- Portable heating mats provide plug-in units laid over existing surfaces for temporary use.
- Chemical de-icers carry low upfront cost but can damage concrete over time.
- Snow-melt pavers offer interlocking pavers with embedded cables for easier service later.
Hydronic systems fit large or commercial drives with long runtime efficiency. Electric systems suit smaller residential areas or retrofits.
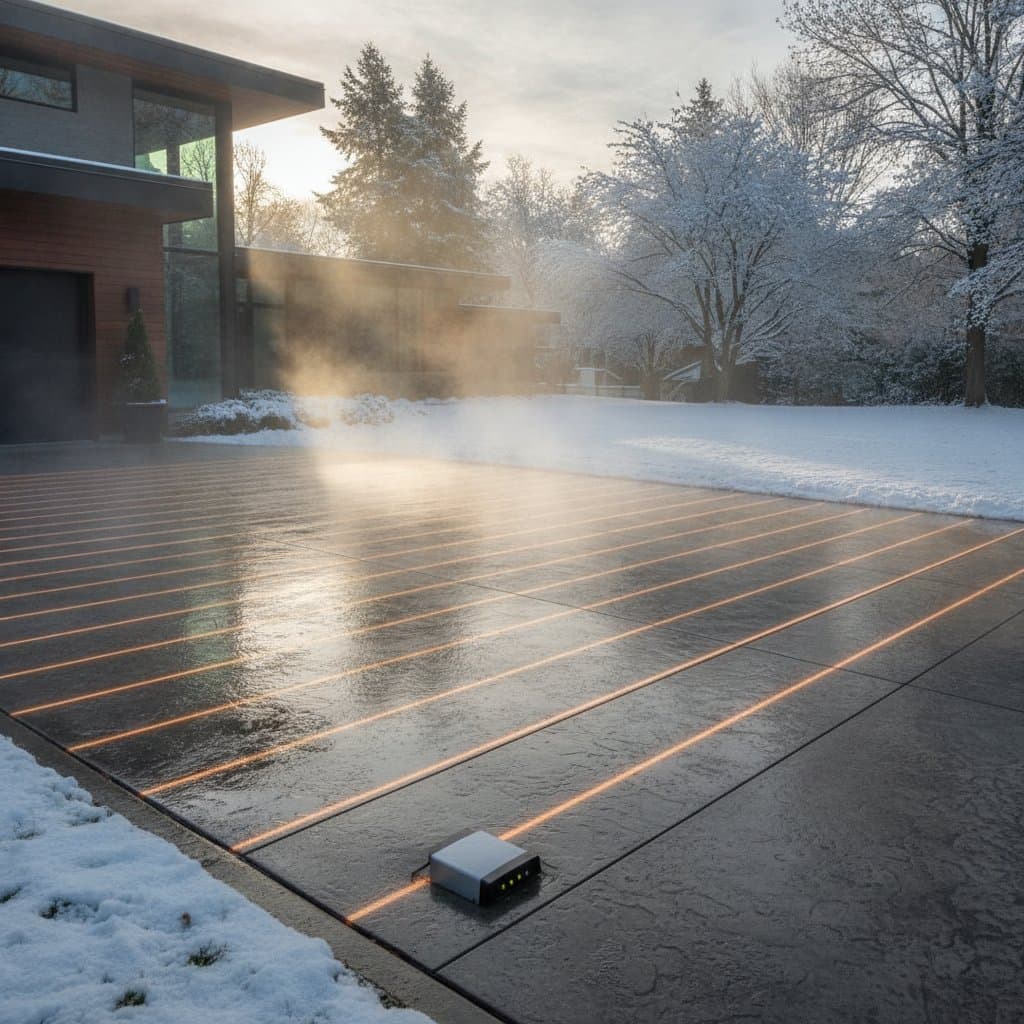
Smart Control Features
Modern heated driveways pair with automatic moisture and temperature sensors. They trigger heat only when snow or freezing rain is detected. Some systems connect to mobile apps for remote monitoring and manual override.
Smart thermostats learn local conditions and predict storm timing, preheating the surface just before snow begins. This improves melt performance and energy efficiency.
Energy Efficiency Tips
- Use insulation board under the slab to cut energy loss by up to half.
- Set melt zones so only high-traffic areas heat.
- Adjust sensor sensitivity to prevent cycling during light frost.
- Combine with solar or geothermal sources for hydronic systems to lower operating cost.
Maintaining Your Investment
Keep sensors clear, circuit boxes dry, and surface joints sealed. Wash away salt residue in spring. Watch for cracks that could expose heating elements.
A smart heated driveway makes winter manageable. It saves time, reduces hazards, and protects your surface from harsh de-icing chemicals. Plan the system carefully, confirm specs, and rely on professional installation where needed.