Recycled Glass Bricks Transform Masonry Projects
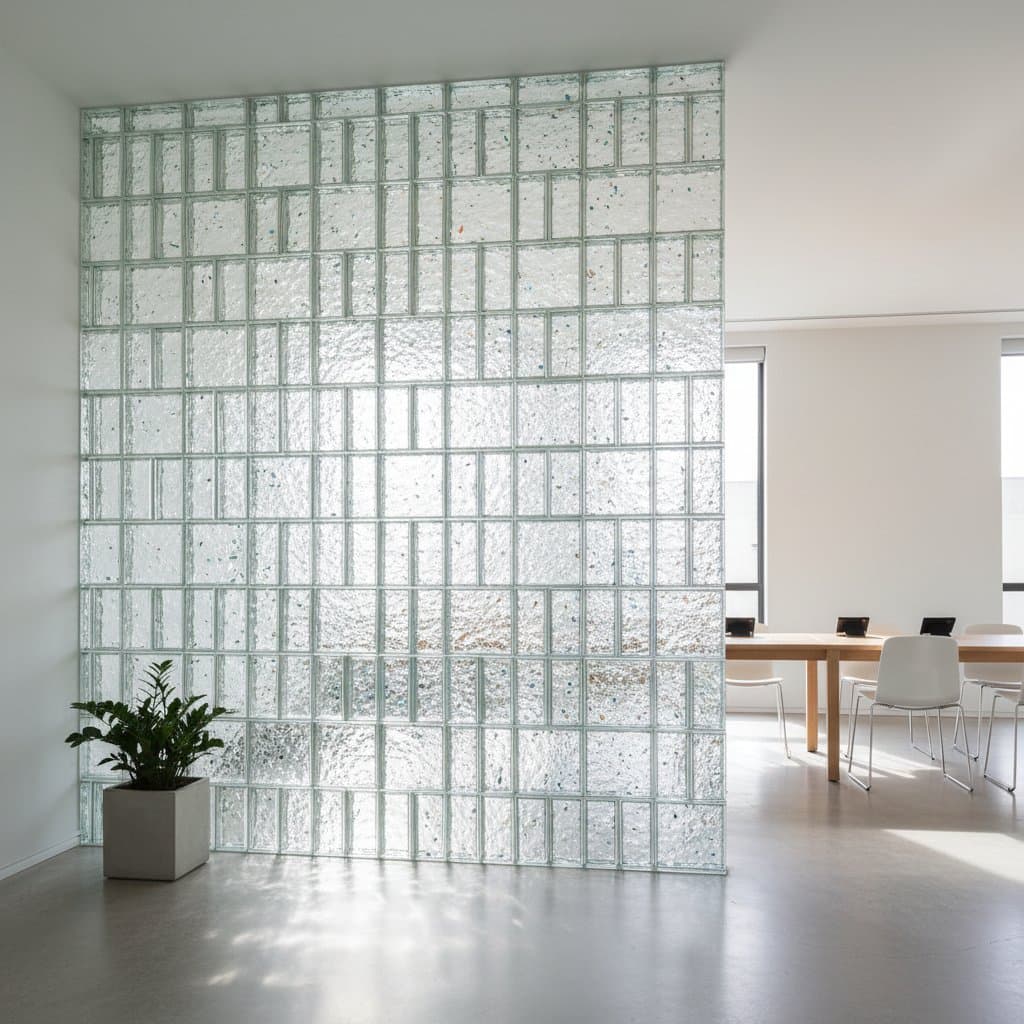
Building with recycled glass bricks combines sustainability, durability, and modern style in one material. These translucent blocks convert discarded glass into a strong masonry option that reflects light effectively. They suit accent walls, privacy partitions, and exterior facades while supporting eco conscious design goals.
Expect a moderate project that requires patience and precision during installation. The process resembles standard masonry yet demands cleaner joints and careful handling to avoid damage. One helper improves safety and speed for lifting and alignment tasks.
Understanding Recycled Glass Bricks
Recycled glass bricks form from crushed post consumer glass that gets melted and molded into solid blocks. This approach diverts waste from landfills and reduces reliance on virgin raw materials. The resulting units capture and diffuse light to create bright, open interiors and exteriors.
Solid bricks deliver high strength and sound insulation. Hollow versions trap air for better thermal performance and weigh less during handling. Both types resist moisture and chemical corrosion, which makes them suitable for bathrooms and poolside applications.
Sustainability benefits include lower manufacturing emissions and minimal maintenance over decades of use. Walls retain their appearance without fading coatings or frequent repainting.
When Professional Help Becomes Necessary
Experienced DIY builders who have completed prior tile or masonry work can handle nonstructural installations. Precise leveling, consistent joint spacing, and proper mortar selection remain essential throughout. Structural walls or those tied into existing framing require engineering review to manage weight and lateral loads.
Projects that integrate electrical wiring or plumbing benefit from licensed specialists. These additions prevent conflicts with building codes and ensure long term performance.
Selecting the Right Material Option
Clear finish bricks maximize light transmission and suit modern aesthetics. They require clean handling because fingerprints and mortar residue show readily on the surface. Colored bricks allow custom accent features though batch variations may appear in larger installations. Textured or patterned units improve privacy and reduce glare while adding visual depth to the finished wall.
Step by Step Installation Process
- Prepare the base by cleaning the surface thoroughly and confirming it sits level. Apply a bonding agent when working over existing concrete.
- Lay the first course with mortar spread to a half inch thickness. Set bricks and verify alignment with a level because this row determines overall wall accuracy.
- Insert spacers or reinforcement rods to keep joints even and increase structural integrity.
- Continue adding rows while applying mortar evenly and pressing each brick gently into position. Check level and plumb after every two courses.
- Place expansion joints every few feet using flexible material that absorbs temperature related movement.
- Wipe excess mortar from joints immediately with a damp sponge before it hardens.
- Allow the wall to cure undisturbed for several days while protecting it from rain and vibration.
- Apply a clear sealer in high moisture areas according to manufacturer guidelines.
Maintaining Performance Over Time
Regular inspection of joints and surfaces keeps the installation in optimal condition. Prompt cleaning prevents buildup that could affect light diffusion. Proper initial installation combined with routine care delivers decades of reliable service and visual appeal.