Deciding Between DIY and Professional Installation
Projects like a decorative garden wall, pathway stepping stones, or countertop accents suit experienced DIY enthusiasts familiar with concrete mixing and surface finishing. These tasks demand moderate effort and access to basic masonry tools such as trowels, levels, and mixers. Success relies on precise measurements to achieve uniform results.
For load-bearing walls, structural blocks, or expansive poured slabs, engage certified professionals. Such installations demand engineering expertise to balance glass content with material strength and curing times. In areas prone to water exposure or freeze-thaw conditions, or when incorporating reinforcement like rebar, seek advice from a structural engineer to avoid risks.
Selecting the Right Materials
Glass Aggregate in Concrete Mixtures
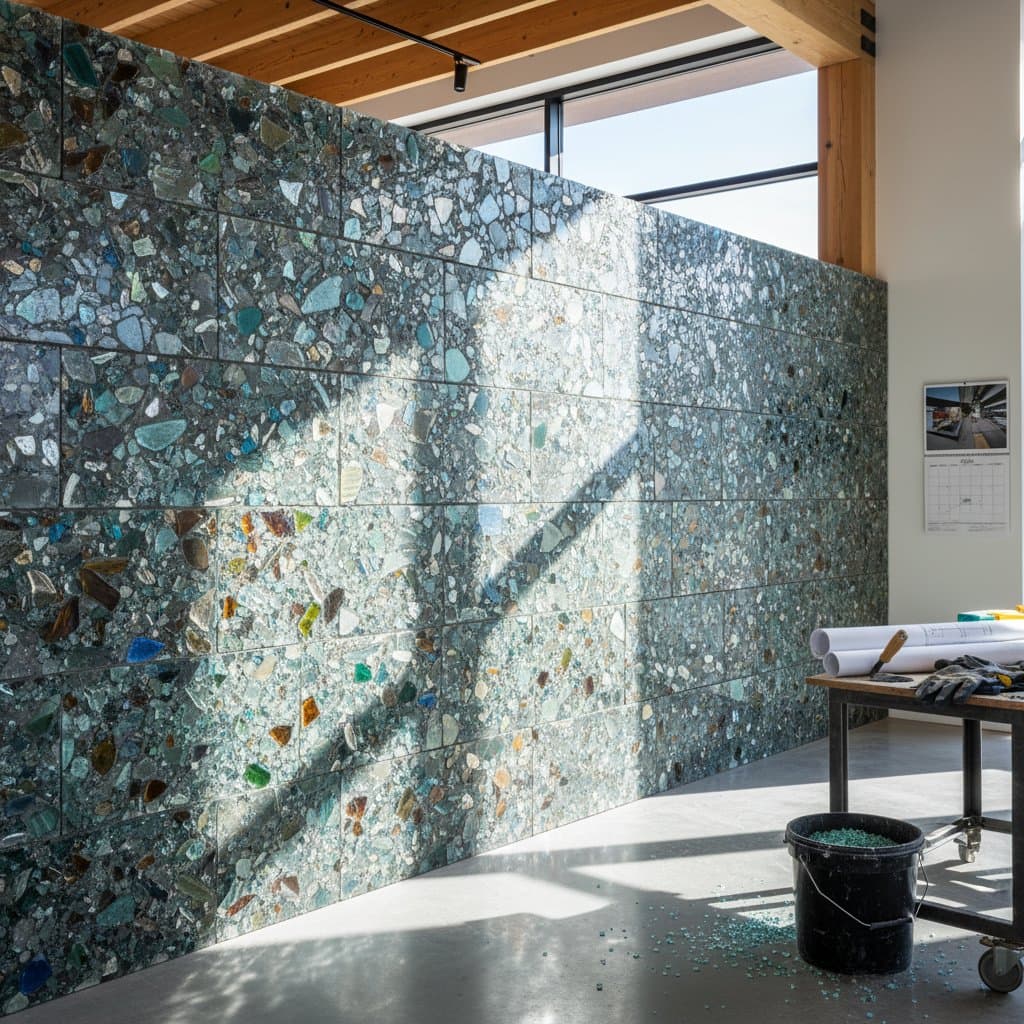
Incorporate recycled glass aggregate to substitute for traditional sand or gravel in concrete formulations, either partially or completely.
Advantages: Promotes environmental conservation, delivers a light-reflective surface, and offers choices in colors from clear to tinted, with sizes ranging from fine powder to 1-inch chunks.
Drawbacks: Demands exact ratios to prevent alkali-silica reactions; untreated glass may require coatings for compatibility.
Estimated Cost: 10 to 20 percent more than conventional aggregates, varying by regional availability and processing.
Required Expertise: Intermediate, including knowledge of mix designs and testing for slump consistency.
Ideal Applications: Kitchen countertops, ornamental panels, or non-structural flatwork like patios.
Preformed Glass Bricks or Blocks
These products form through sintering or melting post-consumer glass, mimicking standard bricks with an added iridescent glow.
Advantages: Provides consistent dimensions for easy stacking, vibrant hues, and superior load-bearing capacity up to 3,000 psi.
Drawbacks: Color options remain narrower than natural clays; units weigh 20 to 30 percent more, increasing handling demands.
Estimated Cost: 25 to 50 percent premium over clay equivalents, offset by longevity.
Required Expertise: Intermediate to advanced, focusing on mortar joints and alignment for stability.
Ideal Applications: Exterior facades, feature walls in living spaces, or low garden enclosures.
Fine Glass in Mortar or Plaster Blends
Use pulverized glass or tiny shards as a sand replacement in mortar or plaster recipes for thin applications.
Advantages: Yields a sleek, mirror-like finish ideal for creative detailing; enhances light diffusion in interiors.
Drawbacks: Accelerates setting time, necessitating quick application; unsealed surfaces attract dust.
Estimated Cost: Aligns with specialty decorative mortars, around $15 to $25 per 50-pound bag.
Required Expertise: Beginner to intermediate, with emphasis on hydration control.
Ideal Applications: Veneer overlays, grout for glass tiles, or repairs on historic surfaces.
Detailed Installation Guide
-
Prepare the Foundation. Clear and compact the underlying soil or substrate to within 1/4 inch of level using a plate compactor. This step minimizes future shifting and cracking.
-
Install Forms and Guides. Secure wooden or metal frames to outline the project area, ensuring they resist pressure from wet materials. Verify straightness and squareness with a string line and carpenter's square.
-
Blend the Components. In a clean mixer or wheelbarrow, add Portland cement, glass aggregate, and admixtures before introducing water incrementally. Target a slump of 4 to 6 inches for pourable mixes; stir until aggregates disperse without clumping.
-
Apply the Mixture. Transfer the blend into the form, starting from the farthest corners and working forward. Employ a trowel or shovel to consolidate, taking care not to disturb glass distribution through excessive stirring.
-
Consolidate the Pour. Tap sides gently with a mallet or apply a low-frequency vibrator to eliminate voids. This process boosts density and reduces porosity for enhanced durability.
-
Level the Surface. Drag a straightedge screed across the top in sawing motions to remove surplus material. Recheck flatness periodically with a 4-foot level, adjusting as needed.
-
Initiate Curing. Mist the surface lightly every few hours for the first 72 hours, or cover with damp burlap and plastic to retain moisture. Slow curing prevents shrinkage cracks and maximizes strength.
-
Reveal the Glass Elements. After 7 days, employ a diamond grinder or acid etch to expose aggregate. Follow with wet sanding using 200-grit pads, progressing to 800-grit for shine.
-
Apply Protective Sealing. Select an acrylic or silane-based sealer suited for masonry; brush or spray two coats, allowing 24 hours between applications. This locks in vibrancy and repels moisture.
-
Final Review and Adjustments. Examine for imperfections under good light; patch small gaps with a matching slurry and reseal. Document the project for future reference.
Key Quality Indicators:
- Even surface without ridges or glass clustering.
- Uniform aggregate exposure across the area.
- Absence of fissures post-curing, confirmed by tap testing.
Expert Advice: Prepare batches of identical volume to ensure seamless transitions in multi-section builds, avoiding visible seams.
Long-Term Upkeep Strategies
Conduct yearly visual checks on sealed areas for signs of fading or abrasion, particularly in high-traffic zones.
Reapply sealant when water absorption occurs rather than beading, typically every 2 to 3 years depending on exposure.
Remove debris using nylon brushes or pH-neutral cleaners on microfiber cloths; steer clear of abrasive pads that etch the glass.
In regions with winter freezes, maintain flexible joint sealants to prevent ice damage from infiltrating cracks.
Address fractures immediately by replacing affected units or sections to uphold overall stability and appearance.
Expert Advice: Steer installations away from areas treated with road salts, as these compounds etch polished glass over time; opt for sand alternatives in such spots.
Expanding Design Possibilities
Recycled glass masonry integrates seamlessly into diverse settings, from framing lush garden planters to edging expansive outdoor lounges or stabilizing sloped landscapes.
Pair it with subtle LED strips to amplify evening glows, creating dynamic shadows and highlights.
In culinary outdoor spaces, embed fine glass within epoxy-resin countertops for hygienic, radiant work surfaces resistant to heat up to 200 degrees Fahrenheit.
Inside homes, craft illuminated dividers or hearth features that soften ambient light while showcasing recycled origins.
Sustained performance comes from vigilant sealing, effective water runoff management, and consistent cleaning protocols. Through thoughtful execution, these installations not only divert landfill waste but also infuse enduring elegance into built environments.