Recycled Glass: Revolutionizing Translucent Walls
Recycled glass has evolved from a mere decorative element into a structural innovation that reshapes translucent walls in architecture. Architects and homeowners now rely on this material to create luminous partitions that integrate sustainability with aesthetic appeal. This guide details the production, installation, and maintenance of recycled glass bricks, highlighting their role in advancing modern construction practices.
Key Takeaways
- Cost range: $80 to $150 per square foot, including 55 percent for materials, 35 percent for labor, and 10 percent for equipment and finishing.
- Wall thickness: Recycled glass masonry walls typically span 3 to 4 inches, delivering strength alongside translucency.
- Installation timeframe: Projects for small feature walls require 2 to 3 days, whereas full facades demand 1 to 2 weeks.
- Thermal performance: These walls provide R-values from 1.5 to 2.5, influenced by composition and thickness.
- Sustainability benefit: Up to 85 percent post-consumer glass per square foot minimizes raw material use and landfill contributions.
Planning Your Recycled Glass Wall Project
Evaluate design objectives, structural demands, and regulatory standards before procuring materials.
Design and Load Considerations
- Structural role: Non-load-bearing walls suit standard recycled glass bricks. Load-bearing designs necessitate bricks with adequate compressive strength and engineer approval.
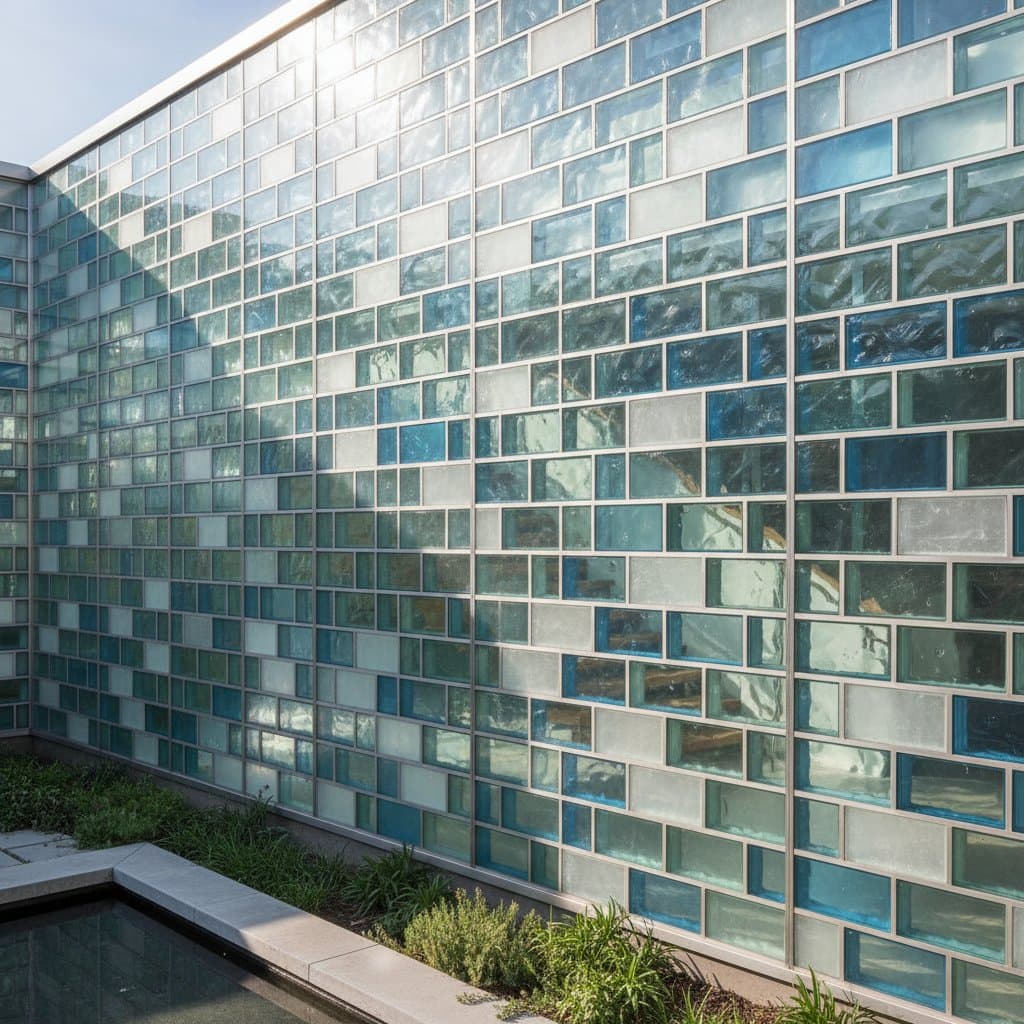
- Light transmission: Choose glass density and finishes based on translucency needs. Frosted options diffuse light uniformly, while clear variants produce distinct visual effects.
- Thermal expansion: Glass expands differently from concrete or steel. Incorporate movement joints every 10 feet to avoid cracks and support expansion.
Permits and Code Compliance
Building codes treat recycled glass masonry akin to traditional glass block systems. Verify the following:
- Fire-resistance ratings, typically 45 to 60 minutes for solid configurations.
- Wind-load standards for exterior uses.
- Safety glazing mandates in impact-prone locations.
Cost Planning
Materials account for over half of expenses in mid-scale projects. Consider this breakdown:
- Materials (55 percent): Bricks, mortar, spacers, and sealants.
- Labor (35 percent): Skilled masons familiar with glass handling.
- Equipment (10 percent): Scaffolding, mixing tools, cutters, and polishing materials.
In cooler regions, extra sealants or insulation may increase costs by up to 10 percent.
Step-by-Step Installation Process
1. Establish the Base Course
Precision in the initial row sets the foundation for the entire structure.
- Spread a 1/2-inch mortar bed on the base.
- Position the first brick for complete contact.
- Check level for plumb and alignment.
- Add spacers to ensure even joints.
2. Build Subsequent Courses
- Spread mortar on the prior course top and vertical joints.
- Offset vertical joints for enhanced stability, following masonry conventions.
- Place horizontal reinforcement rods every 16 inches in height.
- Clean excess mortar promptly to protect glass surfaces.
3. Integrate Structural Reinforcement
For taller or outdoor walls, secure reinforcement to adjacent framing. Install stainless steel anchors at 24-inch intervals vertically and horizontally to resist wind or thermal forces.
4. Finish with Joint Tooling and Cleaning
Upon completing the final course:
- Shape joints into a smooth concave profile for water runoff.
- Clean surfaces using damp sponges or microfiber cloths.
- Permit 48 hours of curing before sealant application.
5. Apply Protective Sealant
Apply a continuous silicone bead along perimeter joints to block moisture and allow thermal shifts. Cure for 24 hours prior to exposure to water or loads.
Troubleshooting Common Issues
Cracking or Separation
Cause: Inadequate joint spacing or absent expansion joints.
Solution: Install additional joints every 10 feet or at corners, sealing with flexible silicone.
Haze or Mortar Residue
Cause: Dried mortar on glass.
Solution: Clean with water during work or apply glass-specific haze removers.
Uneven Light Transmission
Cause: Inconsistent glass thickness or joint dimensions.
Solution: Control joint spacing and mortar uniformity throughout.
Water Infiltration
Cause: Degraded or absent sealant.
Solution: Conduct annual inspections and reseal gaps as needed.
Climate and Site Considerations
Cold Climates
Mortar joints absorb moisture despite glass non-porosity. Employ air-entrained mortar and flexible sealants in freeze-thaw areas to avert damage.
Warm or Humid Climates
Manage joint expansion from temperature fluctuations with UV-resistant sealants. Opt for mold-resistant mortars in moist settings to simplify upkeep.
Seismic Zones
Use flexible anchors that permit movement while preserving structural soundness.
Safety Considerations
Glass brick handling presents unique risks. Adhere to these measures:
- Wear cut-resistant gloves and safety goggles at all times.
- Store units on cushioned surfaces to prevent chips.
- Maintain dry work zones to minimize slips from mortar or fragments.
- Lift bricks with both hands, cradling the base fully.
Secure scaffolding for larger projects and use appropriate lifting gear for heavy units.
Sustainable Value and Design Potential
Recycled glass walls support green certifications by lowering embodied energy and repurposing waste like bottles and windows into durable forms. This approach yields attractive, environmentally sound results.
The material scatters light organically, creating walls that shift with daylight. Pairing with efficient LED lighting further cuts artificial light needs.
Pro Tips for Success
- Order 10 percent extra bricks to cover breakage or cuts.
- Standardize mortar joints for balanced light diffusion.
- Shield fresh walls from vibrations while curing.
- Incorporate LED backlighting for enhanced evening effects.
- Pair with reclaimed wood or metal for comprehensive sustainable designs.