Light Your Yard Sustainably with Solar Smart Pavers
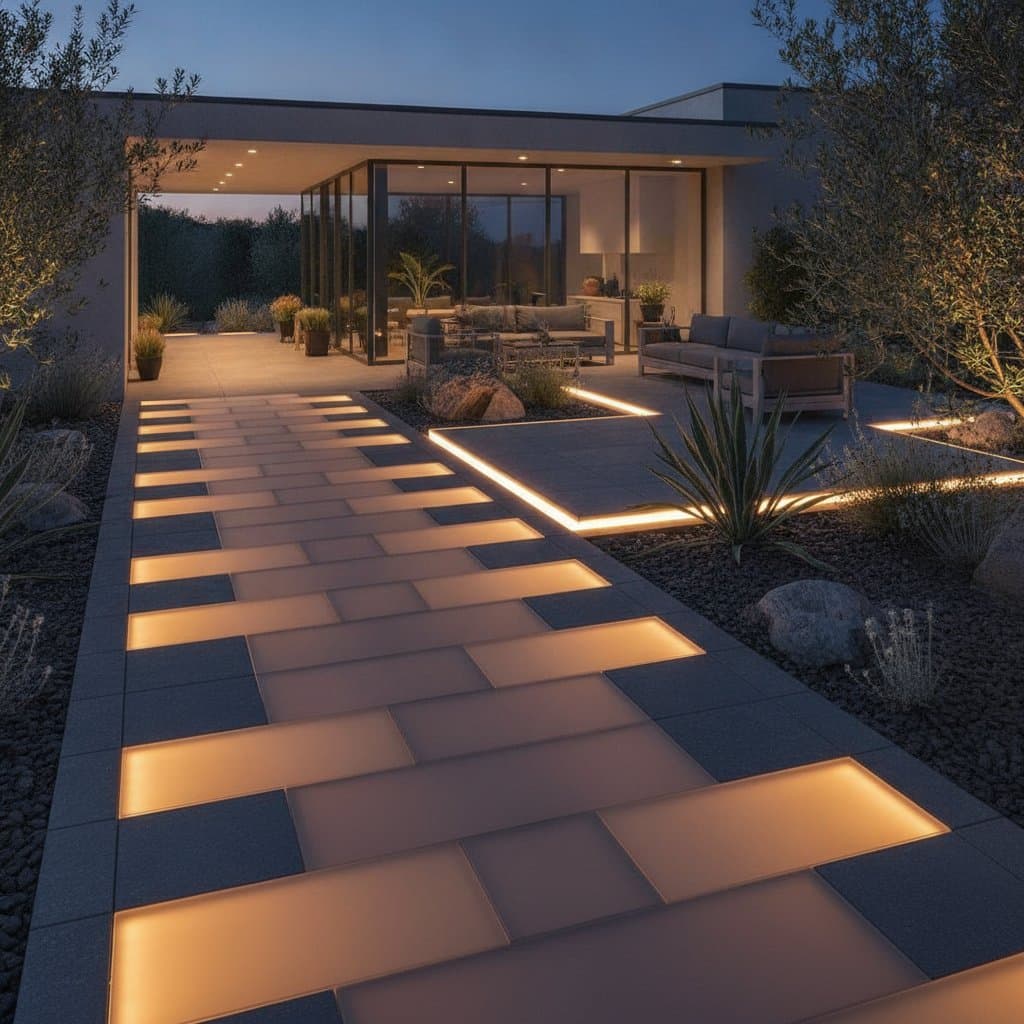
Solar smart pavers combine durable paving stones with integrated LED lights and small solar panels. During daylight hours the panels charge internal batteries. At night the stored energy powers the LEDs to illuminate paths and patios without any connection to household electricity.
Advantages and Limitations
Advantages
- Energy use drops because the units draw no grid power after installation.
- Installation stays simple since no trenches or wiring are required.
- Maintenance remains low as batteries recharge from daily sunlight.
- Visibility improves along walkways while design interest increases.
- Layouts can expand or shift when landscapes change.
Limitations
- Light output stays modest compared with wired fixtures.
- Battery capacity declines after several years of daily cycles.
- Full recharging depends on unobstructed sun exposure.
- Initial cost per unit exceeds that of standard pavers.
- Freeze thaw cycles and road salts can shorten service life without proper sealing.
Cost Expectations
Material prices range from 15 to 35 dollars per square foot. Installed costs typically fall between 25 and 60 dollars per square foot. Premium finishes, higher load ratings, or intricate patterns push totals toward the upper end. Individual lighted inserts that mix with ordinary pavers cost 50 to 100 dollars each.
Service Life and Upkeep
Most units deliver five to ten years of reliable performance before batteries or LEDs require attention. The stone bodies often outlast the electronics when base preparation and sealing are done correctly. Seasonal inspections catch cracks or loose joints early. Clean surfaces with mild detergent and a soft brush. Avoid directing high pressure water at the solar lens. Replaceable battery packs are accessible from below on many models.
Key Specifications to Verify
- Load rating matches expected traffic, whether foot only or vehicular.
- Ingress protection meets IP67 or better for reliable waterproofing.
- Lithium batteries outlast nickel chemistries in daily use.
- Higher efficiency solar cells improve charging under variable light.
- LED color temperature should coordinate with nearby fixtures.
- Dimensions must align with the surrounding paver pattern.
- Temperature ratings confirm suitability for local freeze or heat extremes.
Site Planning Steps
Map lighting coverage and confirm sun access before excavation begins. Position units away from deep shade or roof overhangs. Grade the base so water drains away from the paved area. Install a compacted gravel foundation four to six inches deep for pedestrian use. Maintain a one inch drop in elevation for every eight feet of run. Secure edge restraints and verify utility locations before digging.
Installation Sequence
- Lay out the pattern and mark solar unit locations.
- Excavate to accommodate gravel, sand, and paver thickness.
- Compact the base in two inch lifts.
- Screed a one inch bedding layer of sand.
- Place pavers, alternating lighted and standard units.
- Verify slope and drainage at each stage.
- Install edge restraints and sweep jointing sand into place.
- Compact the surface and clean lenses for initial charging.
Wear gloves and eye protection during cutting. Plate compactors help settle larger areas before final sanding.
Available Formats and Layout Ideas
Full solar pavers contain both the module and LED in one piece. Insert modules fit into openings cut in standard pavers for easier future replacement. Smaller edge markers suit borders and steps. Colored accent tiles create decorative patterns. Straight runs with evenly spaced lights suit most walkways, while circular patios benefit from perimeter rings.
When to Hire Professionals
Homeowners manage projects under 100 square feet with basic tools. Larger areas, sloped sites, or driveway loads call for experienced crews. Professionals ensure correct base depth, consistent slope, and proper sealing that prevents later settlement issues.
Troubleshooting Common Issues
Clean shaded or dirty panels first when lights appear dim. Dry and reseal any cracked lenses to stop water intrusion. Lift and re bed settled pavers to restore an even surface. Replenish joint sand where erosion occurs. Keep spare units from the original batch to maintain color consistency after replacements.
Climate Specific Guidance
Cold regions require explicit freeze thaw ratings and excellent drainage. Hot climates need UV stable lenses and heat tolerant batteries. Coastal installations benefit from marine grade stainless or sealed polymer housings. Dusty desert sites need scheduled panel cleaning. Rainy zones call for extra slope and periodic sealant applications.
Alternative Lighting Options
Low voltage wired pavers provide brighter output at the cost of added wiring. Standalone solar path lights install quickly but sit above the surface. Photoluminescent aggregate concrete offers a subtle glow without electronics. Bollard fixtures deliver stronger illumination and motion sensing when surface integration is less important.
Smart Controls and Energy Features
Many newer models include motion sensors, daylight sensors, and Bluetooth links. Phone apps allow brightness scheduling and zone control. Integration with whole home systems adds roughly 20 to 40 percent to project cost. Open communication protocols prevent vendor lock in for future parts.
Safety and Regulatory Notes
Solar units without wiring rarely need permits. Confirm local rules if any connection to grid power is planned. Keep walkways level, protect eyes and ears during cutting, and avoid vehicle rated placement under tires unless units carry the proper load certification.
Purchasing Recommendations
Inspect samples for lens clarity and seal integrity. Choose warranties of at least two years on electronics. Confirm that batteries and LEDs can be swapped without full paver replacement. Order five to ten percent extra units for cuts and future repairs. Look for recognized safety certifications on every model considered.
Quantity and Layout Calculations
Measure total area in square feet and divide by individual paver coverage. Add five percent for waste. Place one lighted unit every three to five standard pavers along paths or every two feet along edges for balanced illumination.
Routine Maintenance Schedule
Clean lenses quarterly with mild soap. Inspect seals and brightness annually. Refresh batteries on a performance based cycle. Replenish joint sand after heavy rain or traffic. Apply breathable sealer every few seasons to limit moisture uptake.
Battery Longevity Practices
Keep panels free of leaves and pollen. Brush away film gently rather than with abrasive tools. Never seal over the solar surface. Switch units off during extended absences. Store spares in a cool dry location.
Practical Success Strategies
Test every unit in sunlight before placement. Mock up the full layout on the ground to confirm spacing. Label sections during removal so patterns reassemble correctly. Combine solar pavers with low stake lights for layered illumination. Record model numbers and battery types for future service needs.