
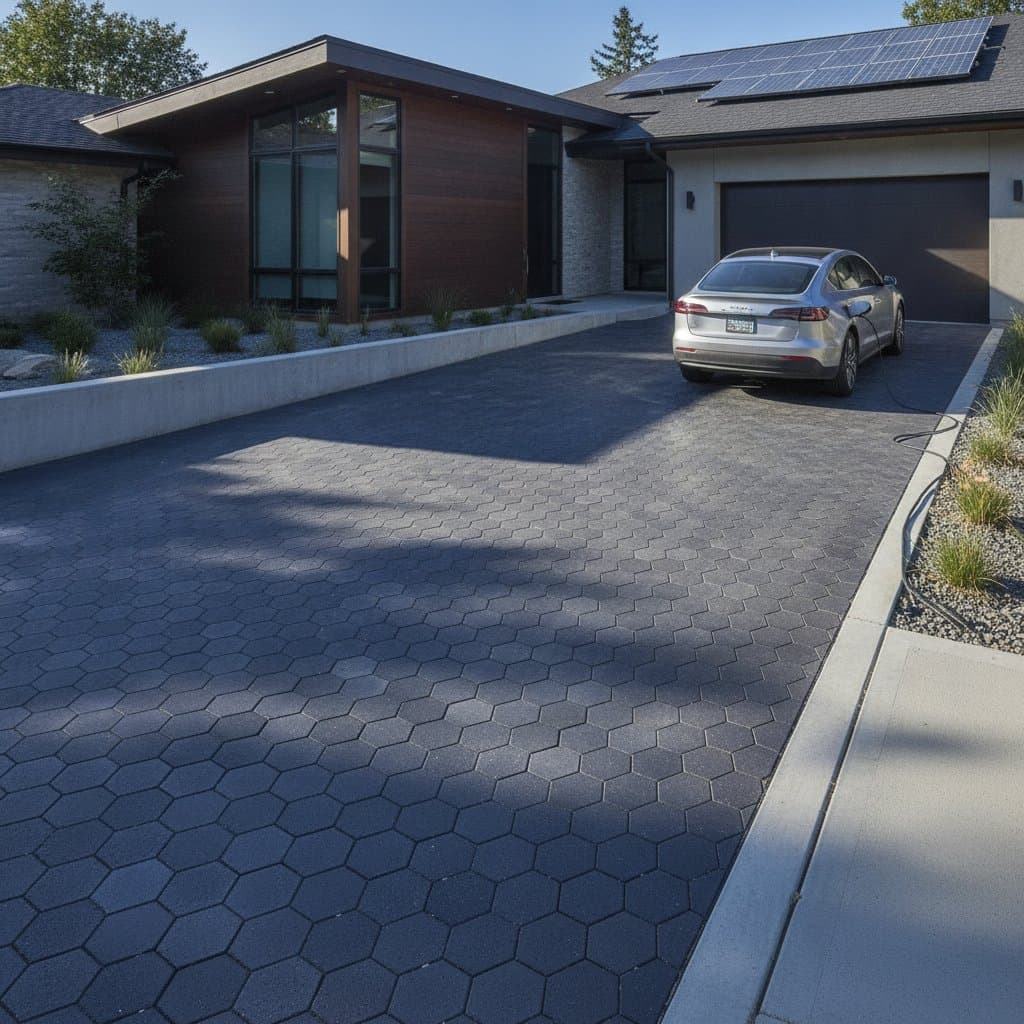
Solar driveways that power your home naturally
A solar driveway combines durable paving with photovoltaic technology that converts sunlight into electricity. This energy-generating hardscape can supply power for household use, electric vehicle charging, lighting, or battery storage while preserving valuable roof space. This guide explains how solar pavers work, what the project costs, how installation differs from conventional masonry, and when professional help is essential.
Key takeaways
- Residential solar driveway installations commonly cost $25,000 to $75,000, with materials and photovoltaic modules representing about 45 to 60 percent, labor about 25 to 35 percent, and electrical work, excavation, and equipment about 15 to 25 percent.
- Plan for a 4 to 8 inch compacted base, a 2 to 3 inch bedding layer, and a driveway slope of about 1 to 2 percent for drainage.
- Solar pavers generate less electricity than an unobstructed roof array because vehicles, joints, dirt, and lower mounting angles reduce solar exposure.
- You must address local permits, electrical rules, stormwater requirements, load capacity, snow, shade, drainage, and battery storage before ordering materials.
- Use qualified professionals for structural design, utility interconnection, photovoltaic wiring, and any excavation near buried services.
How photovoltaic pavers work
Solar pavers contain small photovoltaic cells beneath a transparent, slip resistant surface. Sunlight reaches the cells, which produce direct current electricity. An inverter converts that electricity into alternating current for household circuits or sends it to a battery system.
The pavers function as both a walking or driving surface and a power-generating layer. Their textured glass or composite faces must resist tire loads, impact, moisture, and temperature changes. Quality products include sealed electrical connections and drainage details that protect the photovoltaic masonry from water intrusion.
Output depends on panel orientation, local sunlight, shade, surface cleanliness, and the total active area. A driveway with tree cover or frequent vehicle parking may produce much less energy than its rated capacity. Ask the manufacturer for tested output under realistic conditions, not only laboratory ratings.
Decide whether your site fits
Begin with a site assessment before selecting a pattern or color. Record the driveway length and width, nearby structures, tree shadows, roof runoff, and utility locations. A typical single vehicle driveway measures about 10 to 12 feet wide, while a two vehicle driveway often measures 20 to 24 feet wide.
Evaluate these factors:
- Sun exposure: Favor areas with several hours of unobstructed sunlight and limited shade.
- Slope: Keep grades within the product manufacturer limits. Steeper surfaces require special drainage and traction planning.
- Soil: Clay, expansive soil, and poorly drained fill may require deeper excavation and geotechnical advice.
- Climate: Cold regions need frost resistant base construction below the local frost line or a code approved alternative. Warm, humid areas need careful control of moisture, algae, and thermal movement.
- Use: Confirm that the system supports passenger vehicles, delivery loads, snow removal equipment, or heavier vehicles expected at the property.
A solar driveway makes sense when roof space is limited, a new driveway is already planned, or you want charging close to a vehicle parking area. Conventional pavers may provide better value when shade is heavy or the existing driveway remains structurally sound.
Plan permits, materials, and costs
Contact your building department, electrical authority, utility provider, and stormwater office before demolition. Requirements vary by jurisdiction. The project may need a driveway permit, grading approval, electrical permit, photovoltaic inspection, and utility interconnection agreement. Flood zones and protected drainage areas can add design requirements.
Prepare a complete material list:
- Solar pavers: Select products rated for vehicle loads, outdoor exposure, traction, and freeze thaw conditions where applicable.
- Conventional pavers: Use matching units around edges, transitions, and areas without photovoltaic cells.
- Aggregate base: Install well graded crushed stone sized for soil conditions and drainage.
- Bedding sand or approved setting material: Follow the paver manufacturer specification.
- Geotextile fabric: Separate weak soil from the aggregate base when recommended by the installer.
- Electrical equipment: Include conduit, junction boxes, disconnects, inverter equipment, grounding components, and battery equipment where required.
- Safety equipment: Use eye protection, gloves, hearing protection, high visibility clothing, and respiratory protection when cutting masonry.
National residential costs commonly fall between $25,000 and $75,000, or about $20 to $60 per square foot for smaller or more complex installations. Excavation and base preparation can represent 15 to 25 percent of the budget. Solar pavers and electrical components often account for 45 to 60 percent, while installation labor commonly accounts for 25 to 35 percent. Obtain itemized proposals that identify production estimates, warranties, drainage work, and utility fees.
Prepare the driveway base
Do not install photovoltaic pavers over an unstable surface. A weak base causes settlement, cracked joints, rocking units, and damaged wiring.
Step 1: Mark and excavate
Mark the finished edges, drainage paths, utility locations, and access route. Call the appropriate utility locating service before excavation. Remove soil to the depth required for the base, pavers, and local frost conditions.
Excavate deeper where soil is soft or drainage is poor. Maintain the planned slope, typically 1 to 2 percent, so water moves away from structures without creating unsafe grades.
Step 2: Compact the foundation
Place geotextile fabric where soil separation is needed. Add aggregate in lifts of about 3 to 4 inches, compacting each lift with a plate compactor. Continue until the base reaches the specified thickness, often 8 to 12 inches for residential driveways, with deeper construction in cold or weak soil conditions.
Check elevation with a straightedge and laser level. Correct low areas before installing the bedding layer. Do not use extra bedding material to hide an uneven base.
Step 3: Install electrical pathways
Coordinate conduit placement with the paving pattern. Keep connections accessible through approved boxes, protect wiring from sharp aggregate, and maintain required separation from other utilities. The licensed electrician must complete grounding, disconnects, inverter connections, and utility interface work according to applicable electrical codes.
Install the solar pavers
Spread the specified bedding material to a consistent depth, commonly 1 inch. Set conventional border units first if they establish the pattern. Place solar pavers carefully without dragging them across the bedding layer.
Keep joints uniform and follow the manufacturer spacing requirements. Connect photovoltaic modules only as directed by the product design. Do not cut, drill, or modify solar pavers unless the manufacturer expressly permits it.
After placement, install approved joint material and compact the surface using the manufacturer method. Protect the photovoltaic faces from construction debris, sharp tools, and excessive vibration. Finish edges with restraints that prevent lateral movement.
Test, inspect, and commission the system
Inspect the driveway for rocking units, uneven surfaces, open joints, ponding, damaged faces, and exposed wiring. Verify that drainage flows away from buildings and that transitions do not create trip hazards.
The electrician should test polarity, grounding, insulation, inverter operation, disconnects, and monitoring equipment. Arrange required building and electrical inspections before covering any concealed work. Do not connect the system to the utility until approval is complete.
Photovoltaic output may not match the nameplate rating. Ask for a commissioning report that documents system capacity, expected production, equipment serial numbers, warranty terms, and maintenance instructions.
Choose DIY or professional installation
Homeowners with masonry experience and basic electrical knowledge may handle the paving portion of the project. However, electrical work, utility interconnection, and structural design require licensed professionals. Most jurisdictions mandate that only certified electricians perform photovoltaic wiring and utility connections.
Professional installers bring specialized equipment for excavation, compaction, and paver placement. They also coordinate permits, inspections, and utility agreements. The added cost often proves worthwhile when the project involves complex drainage, poor soil conditions, or integration with existing electrical systems.
Maintenance and long term performance
Regular cleaning maintains maximum energy production. Sweep or wash the surface several times each year to remove dirt, leaves, and debris that block sunlight. Avoid harsh chemicals that could damage the photovoltaic coating or joint materials.
Inspect the driveway each spring and fall for damaged pavers, loose joints, or drainage problems. Address issues promptly to prevent water infiltration and electrical faults. Most manufacturers provide specific maintenance schedules and approved cleaning products.
Monitor system performance through the inverter display or connected app. Compare actual output against expected production to identify problems early. Contact your installer if output drops significantly below projections.
When solar driveways make financial sense
Solar driveways cost more per watt than roof mounted systems because of the specialized pavers and installation requirements. The technology works best for homeowners who need a new driveway anyway, have limited roof space, or want vehicle charging integrated into the parking area.
Calculate the payback period by comparing total project cost against expected energy savings and available incentives. Federal tax credits, state rebates, and utility programs can reduce the net investment. Factor in the extended lifespan of quality solar pavers, which often carry 20 to 25 year warranties.
Consider the complete project scope before committing. Some properties benefit more from conventional pavers combined with a smaller roof array. Others gain significant value from the integrated charging capability and reduced roof penetrations that solar driveways provide.