Assessing Site Conditions First
Solar pavers convert driveways and patios into electricity generators while serving as durable surfaces. Proper function requires attention to drainage, stable foundations, and secure electrical connections from the start.
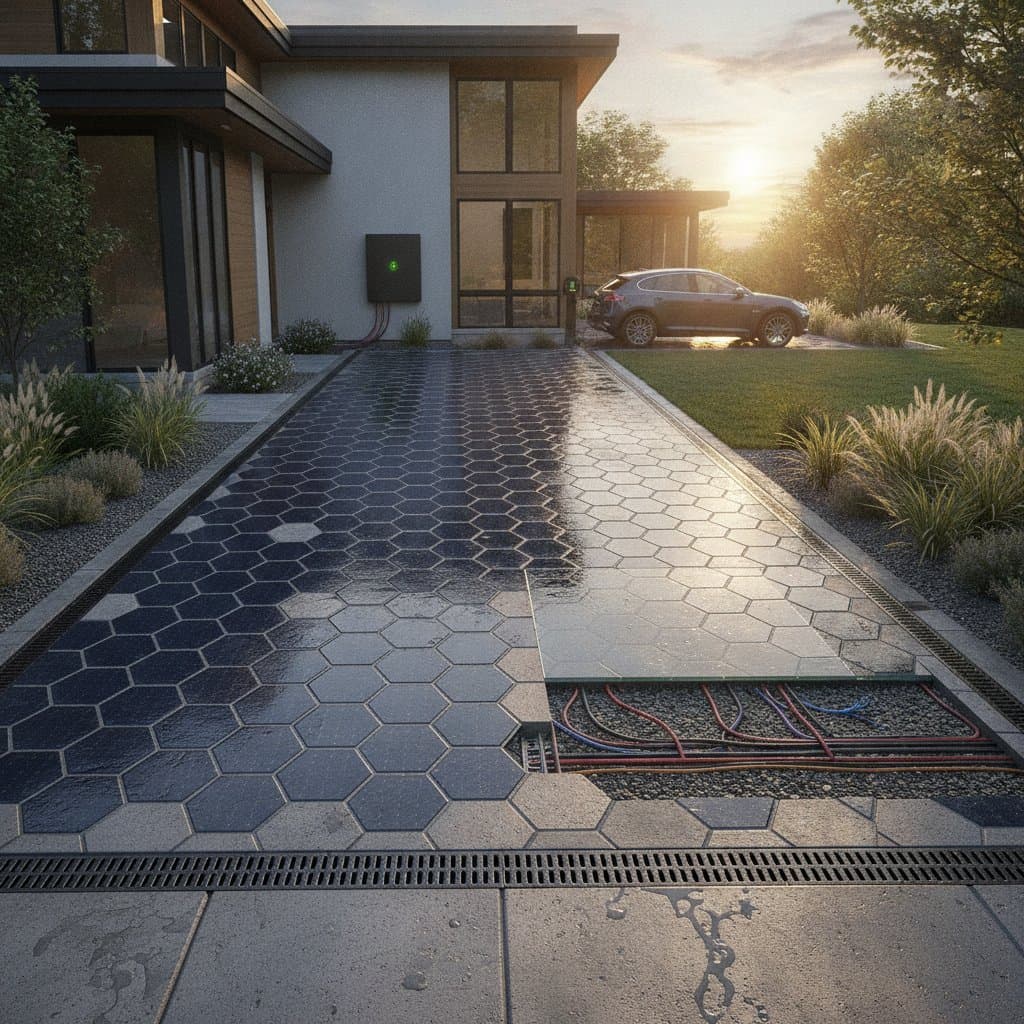
Cheap overlay kits that sit atop existing slabs often trap moisture and fail within a few seasons. Integrated systems route wiring through sealed channels below the surface, with each unit joined by weatherproof junctions and conduits.
Evaluating Repair Versus Full Replacement
Surface and Base Conditions
Level surfaces with correct drainage support partial replacement. Remove one section, install solar pavers tied to a small inverter, and test output before expanding.
Deep cracks or settlement call for complete removal. Solar modules need stable bedding, because even slight movement can break connections or damage the surface layer.
Electrical Panel and Wiring
Modern panels with available space can accept new solar circuits. Older or undersized panels require upgrades before any connection. A licensed electrician must verify grounding and keep conduits away from irrigation or gas lines.
Drainage Corrections
Repair drainage before installation. Standing water corrodes connectors and lowers insulation resistance. French drains or adjusted surface grading cost far less than later module replacement.
Adding to Existing Solar Systems
Properties with roof panels may allow inverter expansion. When expansion is not possible, parallel inverters require balanced circuits, proper wire sizing, and coordinated monitoring.
Assembling the Project Team
Begin with a home inspector or civil engineer who reviews grading and water flow. Next, involve an architect or landscape designer to set layout and load paths.
A general contractor or solar installer joins after the electrical route is set. This order prevents clashes during trenching. Geotechnical input is useful when movement or water intrusion appears. Utility interconnection agreements should start early because approvals take time.
Professional coordination adds cost but prevents missed inspections and warranty problems. Each trade signs off before the next phase begins.
Installation Sequence
- Correct grading and install drainage.
- Compact the gravel and sand sub-base.
- Place conduits and junction boxes.
- Set pavers, connect sealed plugs, and test each circuit.
- Link the inverter to the panel under supervision.
- Record baseline output.
- Seal all joints and edges.
High-priority tasks come first. Confirm slopes, stabilize the base, upgrade the panel, add monitoring, then lay pavers. Low-yield additions such as lighting wait until the core system operates.
Material Choices and Output Expectations
Glass-faced units capture the most light yet suit mild climates. Concrete-encased modules handle vehicle traffic well. Resin composites are lighter but less stable across temperature swings.
Concrete units match standard paver sizes. Output ranges from 5 to 15 watts per tile. A 400-square-foot driveway can produce 2 to 4 kilowatts, though shade and orientation reduce results compared with roof arrays.
Ongoing Care and Monitoring
Inspect after each season for cracks, loose connectors, fogged glass, or unexplained output drops. Replace single modules rather than sections when power is isolated. Store spare tiles from the original batch.
Remove snow with plastic tools only. Keep surfaces clean with low-pressure water and mild detergent. Monthly output checks reveal cleaning needs or wiring issues quickly.
Protecting Long-Term Value
Battery storage captures daytime power for later use. Without storage, net-metering arrangements return excess energy to the grid. Modules last decades when kept dry, while inverters may need replacement after extended service.
Routine checks of gutters and joints prevent sediment buildup. When resealing becomes necessary, use only photovoltaic-rated products. These steps keep both the structural surface and the electrical system performing together.