Quick Overview
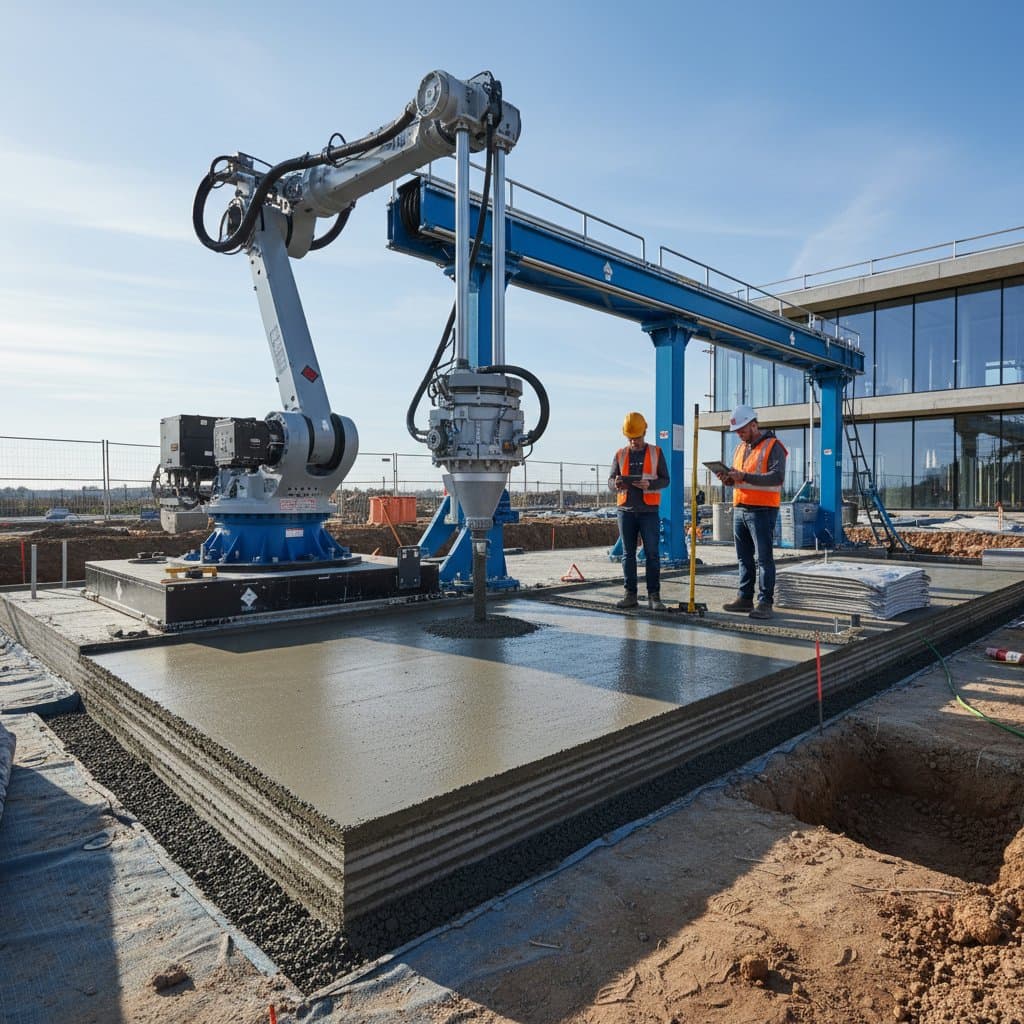
3D-printed concrete foundations represent a shift from experimental prototypes to practical applications in construction. These systems automate the layering of cementitious materials under precise digital guidance, offering potential for quicker and more cost-effective base structures. However, the emphasis on speed can sometimes overlook critical quality aspects, such as mix formulation and curing protocols. Key expenses typically involve the printing equipment, specialized concrete mixtures, and thorough site preparation.
Essential Site Evaluations
Homeowners and builders should perform targeted assessments to determine if a site suits 3D-printed foundation techniques. These evaluations help identify potential challenges early and ensure a stable outcome.
- Soil bearing capacity. Automated printing requires a firm, compacted subgrade. Address any loose, expansive, or saturated soils through stabilization measures prior to printing.
- Footprint complexity. Linear designs with minimal curves or elevations allow for efficient printing and reduced costs. Intricate shapes, such as those with multiple angles or height variations, extend printing time and increase material use.
- Equipment access. Ensure unobstructed paths and level areas for the printer gantry or robotic arm to operate without interference.
- Utility integration. Map out all conduit and pipe routes in advance. Post-print modifications to accommodate utilities can compromise the structural integrity of the walls.
- Environmental moisture management. Layers bond best under uniform curing conditions. Implement shading, periodic misting, or protective coverings in arid or high-heat environments to prevent rapid drying.
Conduct a practical post-rain inspection of the site. Persistent puddles or spongy ground indicate the need for grading adjustments or enhanced drainage solutions before proceeding.
Warning Signs to Watch For
Certain indicators during or after printing signal potential issues that could undermine the foundation's performance.
- Subgrade featuring expansive clays or inadequate drainage that promotes water retention.
- Visible separations or voids between printed layers, known as cold joints.
- Concrete mixture that appears powdery or disintegrates easily when tested by hand.
- Interruptions in the printing process without a methodical resumption, leading to inconsistencies.
- Absence of protective measures during curing, resulting in uneven layer coloration or texture.
- Omission of structural assessments prior to applying loads from slabs or framing.
Such problems often result in differential settling, surface cracking, or diminished load-bearing capacity. Remedying printed concrete post-curing proves challenging, as repairs frequently introduce vulnerable interfaces.
Common Remedies and Estimated Expenses
If initial inspections reveal deficiencies, corrections generally align with conventional concrete repair methods, though costs vary by scale and severity.
- Surface grinding or leveling. Expect charges of 2 to 4 dollars per square foot for smoothing minor protrusions between layers.
- Epoxy injection or patching. Rates range from 8 to 15 dollars per linear foot, suitable for isolated fissures once underlying issues stabilize.
- Underpinning or soil stabilization. This intervention costs 25 to 60 dollars per linear foot, influenced by site accessibility and soil characteristics, and addresses emerging settlement.
- Complete reprint or replacement. Such extensive work mirrors the expense of a traditional pour, approximately 15 to 25 dollars per square foot.
Surface treatments like sealants or thin overlays might mask aesthetic flaws but fail to resolve deeper structural or hydration concerns. Additional expenses arise from retrofitting utility penetrations or anchorage points into already-printed sections.
Deciding Between Repair and Replacement
Evaluate the extent of issues to guide decisions on preservation versus overhaul.
For Printed Walls. Opt for repairs when dimensions meet specifications and defects remain superficial. Proceed with replacement if delamination occurs between layers or if load-bearing columns exhibit internal voids.
For Existing Traditional Foundations. Enhance sound slabs or footings with improved drainage and moisture barriers before integrating new printed elements. Full replacement justifies itself only in cases of significant bearing loss or when a comprehensive redesign becomes necessary.
Hybrid Approaches. Consider printing solely for perimeter walls while employing poured or precast interiors. This method proves effective on sites with inconsistent subgrade moisture levels.
Coordinating the Project Team
A structured workflow minimizes risks through collaborative expertise.
- Site Engineer. Conducts initial soil analysis and determines load-bearing potential.
- Structural Designer. Modifies plans to accommodate printing constraints, including reinforcement placement.
- Printer Operator. Oversees extrusion rates, layer heights, and material flow consistency.
- Concrete Specialist. Validates the mixture's adherence to strength and bonding requirements.
- General Contractor. Orchestrates utilities, subsequent framing, and regulatory inspections.
Involve all stakeholders during the planning stage to preempt conflicts. Engaging a project manager incurs an additional 10 to 20 percent in fees but safeguards against delays from misaligned timelines.
Prioritizing Project Elements
Maximize benefits from 3D printing by targeting straightforward components where automation excels.
- Optimal applications: Grade beams, compact retaining walls, or perimeter foundations for crawl spaces.
- Viable options: Complete slabs with uncomplicated reinforcement and plumbing configurations.
- Less ideal scenarios: Elaborate basements or tiered structures demanding variable wall thicknesses.
Focus investments on robust air sealing and perimeter drainage over mere acceleration. Incomplete site preparation or absent moisture barriers can negate the advantages of rapid printing. Effective water management defines the foundation's enduring success.
Budgeting and Timeline Essentials
While 3D printing accelerates certain phases, overall efficiency hinges on sequential dependencies.
- Prepare and compact the site grading.
- Confirm drainage gradients and establish interim water diversion.
- Install utility lines and protective sleeves.
- Execute the wall or footing print with ongoing monitoring.
- Facilitate curing through regulated humidity and protection from elements.
- Perform strength testing prior to imposing structural loads.
- Advance to framing and building enclosure.
Accelerating curing or bypassing verification invites costly rework. Although the printing operation may conclude within a single day, comprehensive preparation and follow-up demand several additional days.
Insights from Initial Implementations
Field trials confirm that printing delivers tangible time reductions when logistics align seamlessly. Integrated teams that handle staging, mixing, and extrusion concurrently outpace traditional formwork methods. Disruptions from equipment glitches or inconsistent material batches, however, can eliminate these gains.
One Midwestern builder noted, “We saved labor on formwork, but lost a week waiting for the right mix moisture.” This experience highlights the transition: automation reduces hands-on labor yet demands heightened attention to material precision and equipment tuning.
Ensuring Lasting Performance
The layered nature of printed concrete introduces interfaces that require strong adhesion to match monolithic strength. Superior techniques apply consistent extrusion forces and formulations that foster interlayer chemical bonding. Monitor for subtle horizontal fissures or edge spalling as early indicators of concern.
Curing uniformity poses the primary challenge. Unlike uniformly hydrated traditional pours, printed structures risk gradient drying, particularly at exposed surfaces. This may lead to uneven contraction over years. Lacking extensive longitudinal studies, approach printed foundations cautiously in humidity-sensitive areas such as below-grade spaces.
Sustainability and Economic Perspectives
Printing optimizes material use by depositing concrete precisely along structural lines, bypassing excess formwork. Waste reduction reaches 30 to 60 percent on basic layouts. Fewer personnel manage forming and compaction, lowering labor demands.
Offsetting factors include the substantial upfront investment in printing hardware, often necessitating rentals or specialized contractors. Proprietary admixtures for rheology and set control elevate mix costs per cubic yard, though scalability on larger projects offsets this.
Energy consumption parallels standard mixing operations. Broader environmental benefits stem from minimized waste and decreased hauling of temporary forms.
Protecting the Foundation Long-Term
Routine upkeep mirrors that of conventional concrete, emphasizing prevention of water ingress and ground shifts.
- Verify site grading and gutter systems following heavy precipitation.
- Apply sealants promptly to minor fissures using compatible materials.
- Maintain clearance from trees and shrubs to avoid root-induced pressures.
- Examine bolts and sill connections periodically for signs of rust.
Consult a structural expert versed in additive manufacturing if horizontal cracking appears or if settlement exceeds one-quarter inch over a ten-foot span.
Steps to Successful Implementation
Validate the process by constructing a trial segment. Assess dimensional precision, curing consistency, and operational duration, then review findings with your engineer to affirm structural adequacy.
Adapted Checklist for Foundation Review
- Confirm site grading and compaction with no water accumulation.
- Verify uniform layer heights and seamless joint appearances.
- Ensure clear drainage routes without perimeter pooling.
- Observe reinforcement positioning prior to printing initiation.
- Deploy curing protections or humidity controls throughout the setting period.
- Document and analyze compression test outcomes before applying loads.